Backyard Paver Installation: 7 Expert Tips for Success
Backyard paver installation is a fantastic way to boost the aesthetic and utility of your outdoor space. This process involves careful planning and execution but can result in a stunning patio that withstands the test of time. Here’s a quick guide to set you off on the right track:
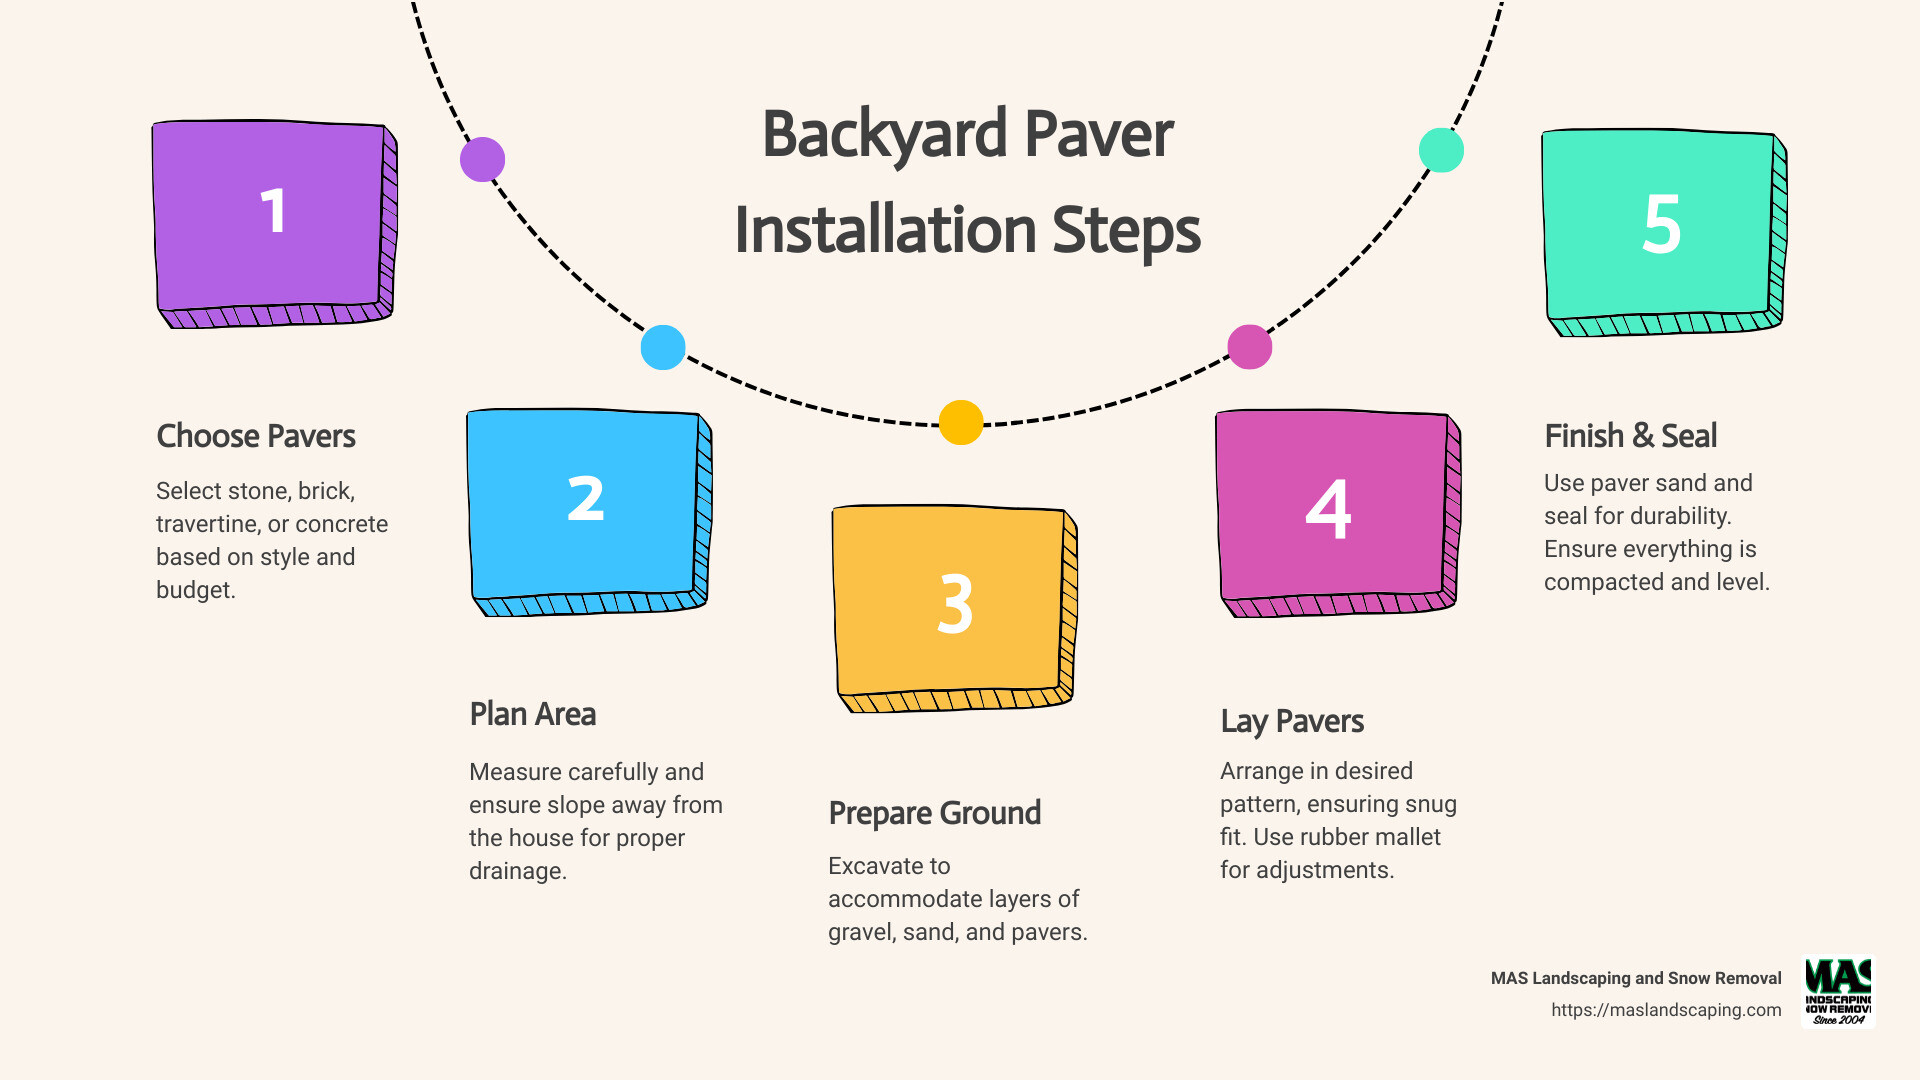
- Choose your pavers: Opt for stone, brick, travertine, or concrete depending on your style and budget.
- Plan the area: Measure carefully and ensure a slope away from the house for drainage.
- Prepare the ground: Dig deep enough to accommodate the layers of gravel, sand, and pavers.
- Lay the pavers: Arrange them in your desired pattern, ensuring each is snugly fit.
A well-executed paver patio offers several benefits. It’s durable, requiring little maintenance, and it can improve property value when thoughtfully integrated into your landscape. The result is a beautiful, functional area suitable for entertaining, relaxing, or expanding storage.
Deciding between DIY and hiring professionals depends on your comfort with hands-on work and the project’s complexity. For simple projects, DIY might be rewarding. However, professional help ensures high-quality results, handling complications like drainage more effectively.
Basic backyard paver installation vocab:
– patio paver installers
– paver installation near me
– patio pavers near me
Preparing the Ground for Pavers
Before diving into the backyard paver installation, it’s crucial to prepare the ground properly. This foundation will ensure your patio is stable, long-lasting, and beautiful.
Clear the Area
Start by clearing the area of any roots and rubble. Why? Because roots can cause uneven surfaces and rubble can prevent proper leveling. Use a spade or shovel to remove any grass, plants, and debris from the designated area.
Excavation
Next, you’ll need to excavate the area. Dig down to a depth that allows for the layers of materials: gravel, sand, and pavers. Generally, this means digging about 6-8 inches deep.
Tip: Make sure to maintain a slight slope away from your house. This helps with drainage and prevents water from pooling near your foundation.
Sand Sub-Base
Once the area is clear and excavated, it’s time to add a sand sub-base. Spread a 1-inch layer of sand evenly across the area. This sand layer acts as a cushion and helps with leveling the pavers.
Compacting the Base
For a firm foundation, compact the base using a hand or mechanical compactor. A tamper can be used for smaller areas, while a plate compactor is more efficient for larger spaces. Compacting ensures the ground is solid and prevents shifting over time.
Leveling
Finally, ensure the area is level. Use a long board or a level tool to check the surface. Adjust as needed by adding or removing sand.
Remember: Proper preparation is key to a successful paver patio. Skipping these steps can lead to uneven surfaces and costly repairs down the line.
By following these steps, you’ll create a solid foundation for your paver patio that will stand the test of time. Next, let’s dive into the materials you’ll need for this project.
Materials Needed for Backyard Paver Installation
When starting on a backyard paver installation, having the right materials is as crucial as preparing the ground. Here’s a rundown of what you’ll need to ensure your project is a success.
Gravel
Gravel forms the backbone of your paver patio’s foundation. It’s laid down first to provide a stable and well-draining base. Aim for a 6-inch layer of gravel to support the structure and prevent settling. This layer helps distribute weight and ensures proper drainage, keeping your patio level and long-lasting.
Paver Sand
After the gravel, a 1-inch layer of paver sand is added. This sand acts as a cushion for the pavers and aids in leveling. The sand is also essential for locking the pavers in place, preventing them from shifting over time. Use a screed board to spread the sand evenly across the gravel base.
DIY Patio Pavers
Choosing the right pavers is key to the aesthetic and durability of your patio. DIY patio pavers come in various shapes, sizes, and colors. Consider the pattern you want to create, as some designs may require more cutting and fitting than others. For a simple installation, opt for jack-on-jack or running bond patterns.
Mortar
Mortar can be used to secure the pavers, especially in areas where extra stability is needed, like edges. While not always necessary, it provides additional bonding strength, ensuring the pavers stay in place.
Bituminous Material
For those in areas with extreme weather conditions, bituminous material may be used to improve the adhesion of the pavers to the base. This sticky, tar-like substance provides a strong bond, reducing the risk of pavers shifting due to temperature changes or heavy loads.
Pedestals
Pedestals are an alternative to traditional sand and gravel bases. They’re ideal for creating a level surface on uneven ground. By adjusting the height of each pedestal, you can achieve a perfectly flat patio without extensive excavation. This method is particularly useful for rooftop patios or areas with poor drainage.
Each of these materials plays a vital role in the overall success of your paver patio. Selecting the right combination will ensure your patio is not only beautiful but also durable and functional. With your materials ready, you’re well-prepared to move on to the step-by-step installation process.
Step-by-Step Guide to Installing Pavers
Measuring and Planning
Before you start digging, grab a tape measure. You’ll need to know the exact square footage of your future patio. This measurement helps you calculate how many pavers, how much gravel, and how much sand you’ll need. Using a paver calculator can make this process a breeze, ensuring you buy just the right amount of materials.
Excavating the Area
With your measurements in hand, it’s time to dig. Use a spade and shovel to clear the area of grass and soil. If you have access to a skid steer, it can save you a lot of time, especially for larger projects. As you dig, remember to maintain the correct depth and slope. The patio should slope slightly away from any structures to prevent water pooling. A mason’s line can help keep your depth and slope consistent.
Adding the Paver Base
Lay down a 4- to 6-inch layer of gravel using a landscape rake to spread it evenly. Compact the gravel with a tamper or rent a plate compactor for larger areas. A garden hose can be used to lightly wet the gravel, which helps it compact more effectively, creating a firm base.
Leveling the Paver Sand
Place electrical conduit on the compacted gravel. This will serve as a guide to ensure your sand is level. Spread a 1-inch layer of sand using a 2- x 4-foot board to screed and level it. Use a level to check your work. Remove the conduit and fill in the gaps with sand, smoothing it out as you go.
Placing the Paver Stones
Start laying your pavers from a corner. Ensure each paver has a snug fit by tapping it gently with a rubber mallet. Maintain a consistent pattern as you work across the patio. This not only looks good but also helps with stability.
Cutting and Edging
For pavers that need trimming, a masonry saw is your go-to tool. Always wear gloves and protective eyewear when cutting. Once all pavers are in place, secure the perimeter with edging stones or paver edging to prevent shifting.
Finishing Touches
Finally, spread paver sand over the entire patio and use a push broom to sweep it into the joints between pavers. This locks them in place. Run a plate compactor over the patio to ensure everything is set firmly. This step is crucial for a lasting, stable patio.
With these steps, your backyard paver installation will not only look professional but also stand the test of time. Next, let’s explore some tips and tricks to improve your paver patio’s durability and appearance.
Tips and Tricks for a Successful Paver Patio Installation
Creating a backyard paver installation that lasts requires attention to detail and a few expert tricks. Here’s how to ensure your paver patio is as durable as it is beautiful.
Proper Drainage and Slope
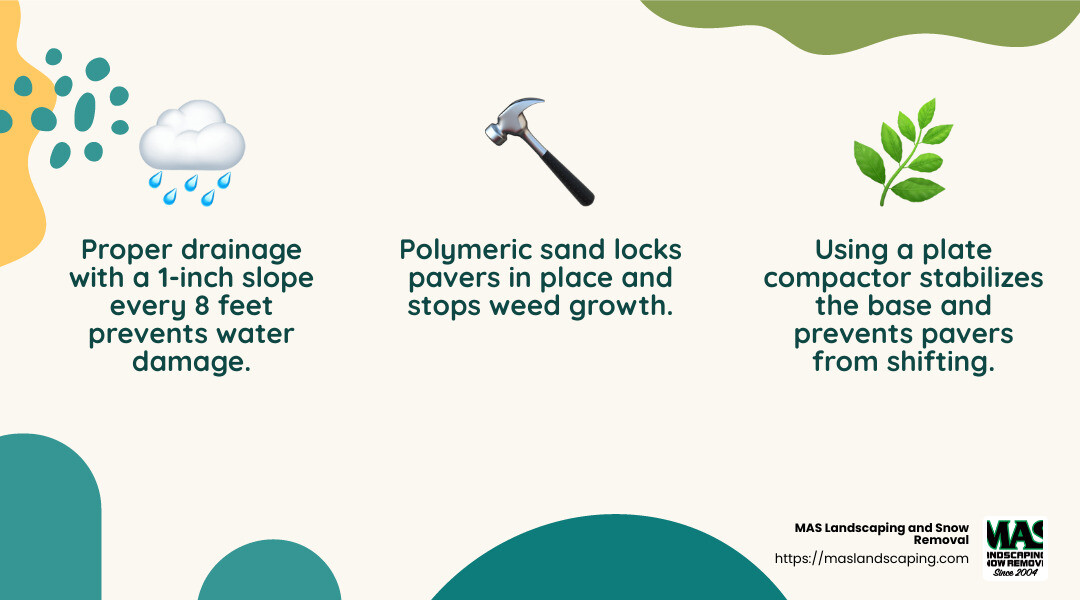
Water management is critical. Ensure your patio has a slight slope, about 1 inch for every 8 feet, to direct water away from your home. This prevents pooling and potential damage. Use a mason’s line to maintain this slope throughout the installation process.
Compacting Tools
A firm base is essential. Use a hand tamper for small areas, but for larger projects, renting a plate compactor is worth the investment. Compacting the gravel base and the sand layer ensures stability and prevents pavers from shifting over time.
Screed Board
Achieving a perfectly level sand layer is easier with a screed board. Use it to smooth the sand over the compacted base. This tool helps distribute the sand evenly, ensuring a solid foundation for your pavers.
Polymeric Sand
Once your pavers are in place, fill the joints with polymeric sand. This special sand contains polymers that harden when wet, locking the pavers in place and preventing weed growth. Sweep it into the joints and lightly mist with water to activate the binding agents.
Paver Sealer
A paver sealer is like a protective shield for your patio. It guards against stains, weather damage, and even improves the color of your pavers. Apply it after the polymeric sand has set, and reapply every three to four years to maintain your patio’s appearance and integrity.
By following these tips, your backyard paver installation will not only look fantastic but also withstand the elements for years to come. Next, we’ll address some frequently asked questions to further assist you in your paver patio journey.
Frequently Asked Questions about Backyard Paver Installation
How do you prepare the ground for pavers?
Preparing the ground is the first step in any successful backyard paver installation. Start by ensuring the area is root and rubble-free. Remove any grass, roots, or debris that could interfere with your pavers.
Next, focus on creating a stable foundation with a sand sub-base. This layer helps distribute weight evenly and prevents shifting. Compact this sand layer using a hand or mechanical compactor to create a firm base. Compacting is crucial—it ensures your pavers won’t sink or shift over time.
Can I install pavers myself?
Yes, you can! Installing pavers is a manageable DIY project with the right planning and tools. Start by measuring your area and planning your layout. Use a paver calculator to determine how many pavers you’ll need.
Make sure you have the necessary tools: a tape measure, a shovel, a level, and a rubber mallet, to name a few. While DIY installation is cost-effective, be prepared to invest time and effort. If you’re unsure, consider consulting with a professional to guide you through the process.
What do you put under pavers?
The layers beneath your pavers are key to a long-lasting installation. Start with a gravel base to promote drainage and provide stability. On top of this, add a layer of paver sand for leveling.
In some cases, additional materials like mortar or bituminous material can be used to secure the pavers further. Pedestals are another option, especially for liftd or rooftop installations. These materials help ensure your pavers stay in place and maintain their alignment over time.
By understanding these foundational elements, you’ll be well-prepared to tackle your own backyard paver installation project. In the next section, we’ll wrap up by highlighting the advantages of choosing MAS Landscaping and Snow Removal for your landscaping needs.
Conclusion
Choosing the right team for your landscaping project can make all the difference. At MAS Landscaping and Snow Removal, we pride ourselves on delivering professional service and leveraging our local expertise to transform your outdoor spaces into beautiful and functional areas. Whether you’re in Everett, Lynnfield, Malden, or the surrounding areas, our team is dedicated to crafting outdoor environments that reflect your personal taste and lifestyle.
Our experience in the region allows us to understand the unique challenges and opportunities presented by the local climate and terrain. This knowledge ensures that your backyard paver installation not only looks stunning but also stands the test of time. From choosing the right materials to ensuring proper drainage and slope, we’ve got you covered.
We believe in a collaborative approach to landscaping. Our team works closely with you, ensuring that your vision is at the forefront of every decision. Whether you’re looking to add a new patio, improve your garden with vibrant plantings, or simply maintain your existing landscape, we’re here to help you every step of the way.
For those ready to transform their outdoor living spaces into stunning realities, consider partnering with us. With our commitment to excellence and personalized service, MAS Landscaping and Snow Removal is your go-to choice for all things landscaping in the area.
Ready to start your journey toward a beautiful outdoor space? Contact us today to get started. Let’s bring your dream landscape to life together.
