How to Plant Sod: 5 Expert Tips for Success 2024
How to plant sod and get an instant, lush lawn might sound too good to be true, but it’s completely doable. Here’s the quick answer:
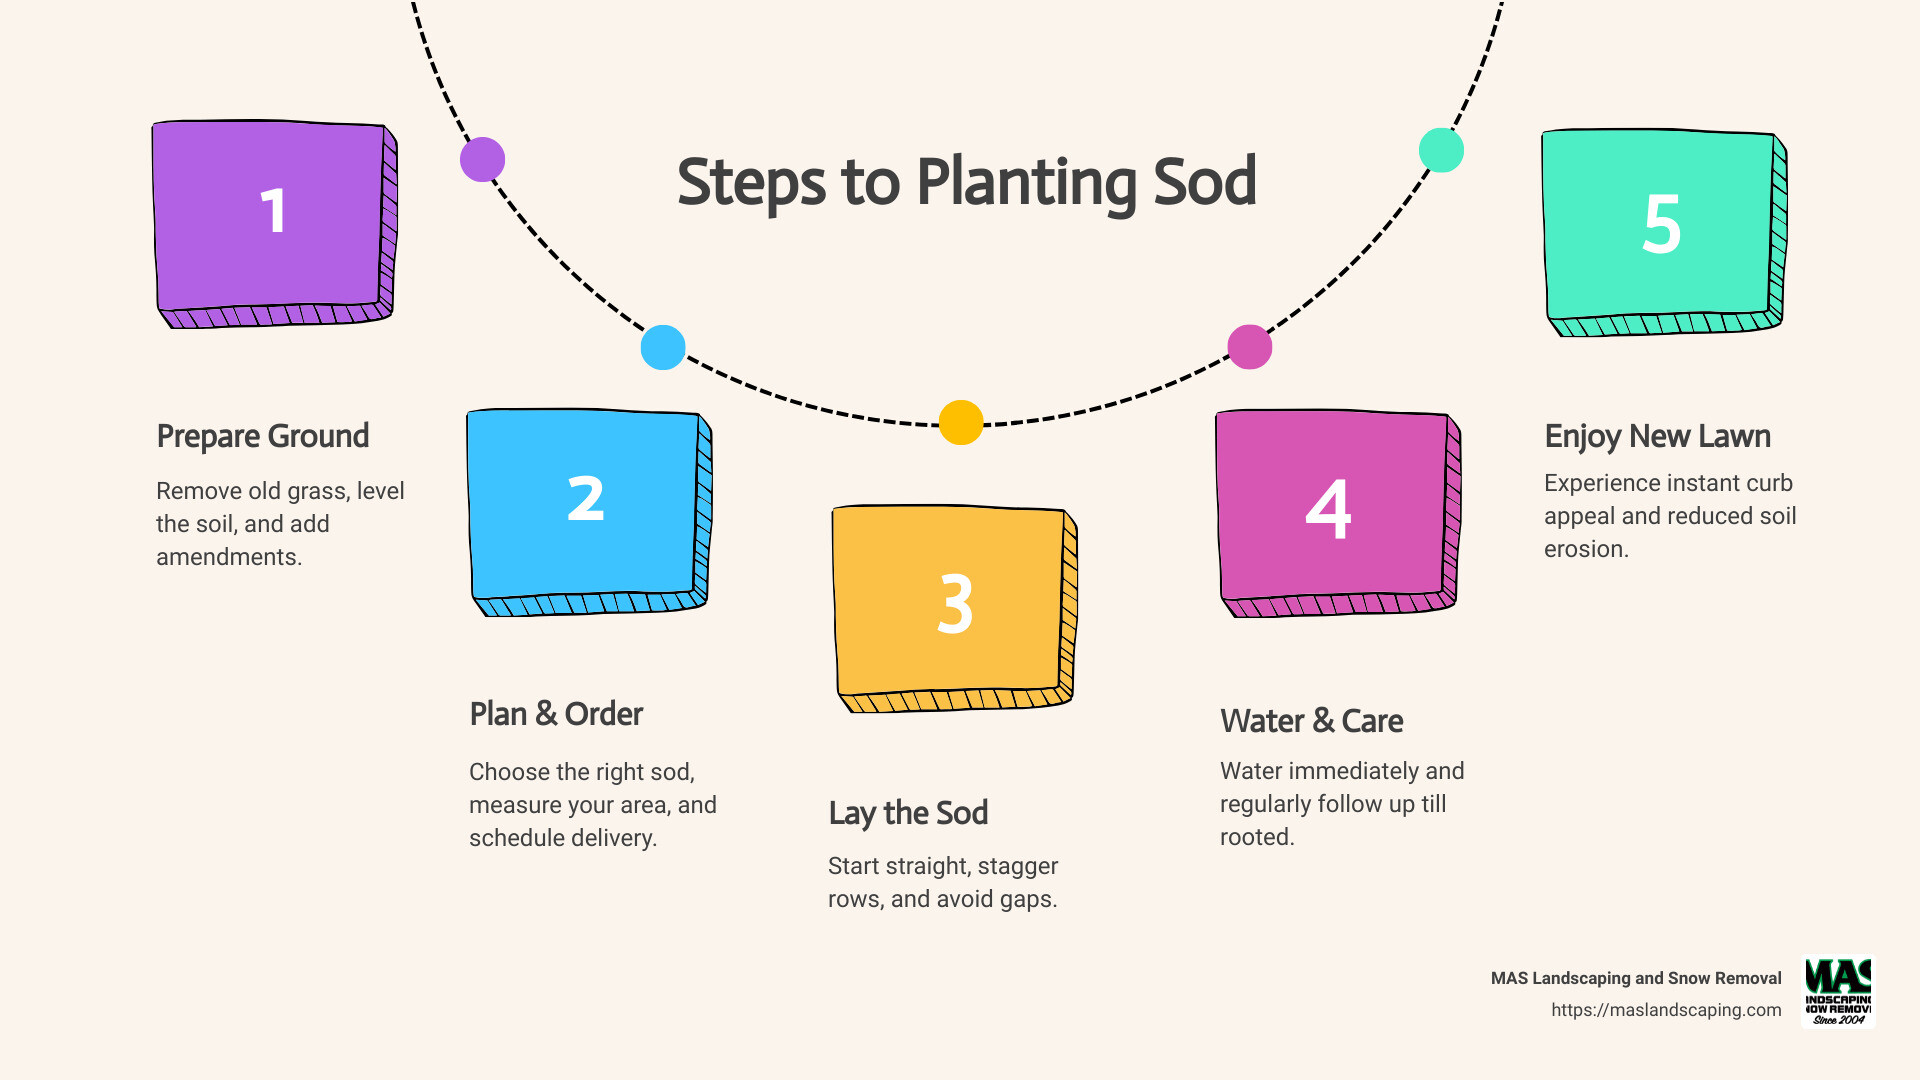
- Prepare the ground: Remove old grass, level the soil, and add amendments.
- Plan and order: Choose the right sod, measure your area, and schedule delivery.
- Lay the sod: Start straight, stagger rows, and avoid gaps.
- Water and care: Water immediately, then regularly follow up till rooted.
With sod, you avoid long waits typical of grass seed. Instead, you get immediate gratification—your yard transforms almost overnight into a carpet of green. Sod holds many benefits: it prevents soil erosion, helps control weeds, and instantly improves your home’s curb appeal.
When you lay sod, you’re not just rolling out grass; you’re making a smart, long-term investment. It saves you time, allows for short-term landscaping projects, and offers a resilient and robust lawn solution. If you’re in the Greater Boston area and need a lawn that looks great quickly, planting sod is your answer.
How to plant sod word guide:
– how to prepare ground for sod
– how to install a new lawn
– how to lay sod
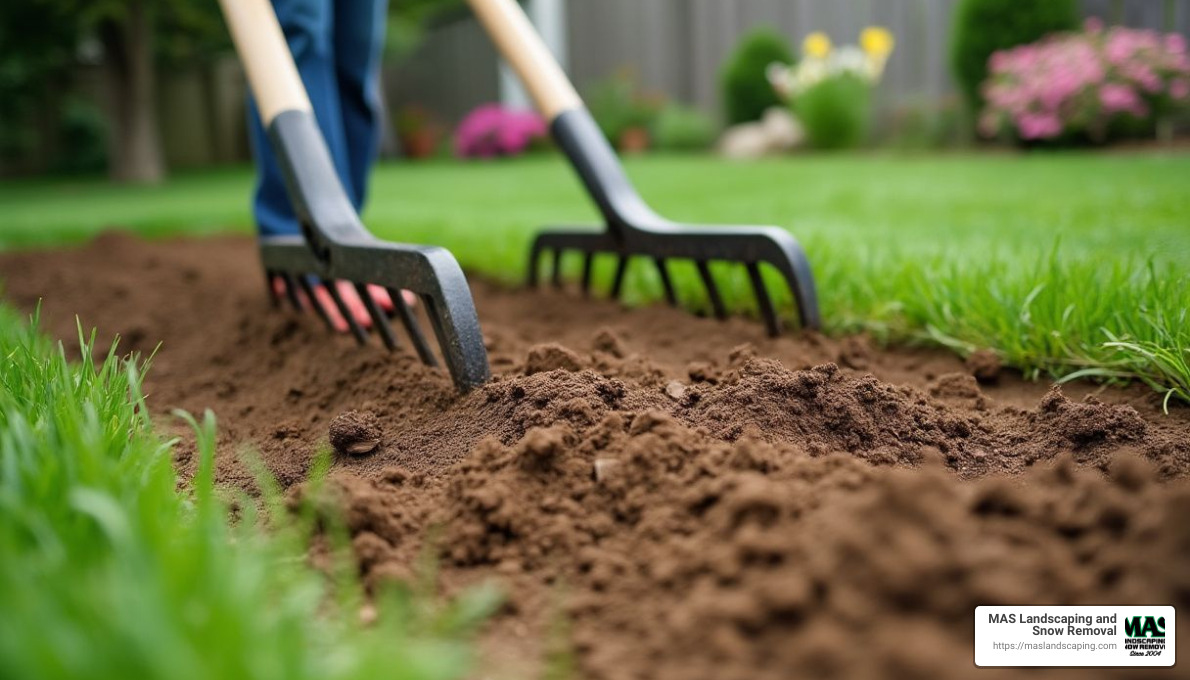
Preparing the Ground: The First Step in How to Plant Sod
Before you can enjoy that lush, green lawn, you need to get the ground ready. This step is crucial in how to plant sod correctly. Let’s break it down into simple steps.
Soil Testing
First things first, you need to know what’s going on beneath the surface. Soil testing helps you understand the pH levels and nutrient content of your soil. These factors play a big role in how well your sod will grow.
- pH Levels: Most turf grasses thrive in slightly acidic to neutral soil, with pH levels between 6.0 and 7.0. If your soil is too acidic or alkaline, your sod might struggle.
- Nutrient Analysis: A soil test will also tell you if your soil is lacking key nutrients like nitrogen, phosphorus, or potassium.
You can easily get a soil testing kit online, or for more precise results, send a sample to your local extension service. They’ll provide you with detailed advice on what your soil needs to support healthy sod growth.

Rototilling and Soil Amendments
Once you know what your soil needs, it’s time to get your hands dirty.
- Rototilling: Use a rototiller to break up compacted soil. This helps the roots of your new sod reach down deep and establish a strong foundation.
- Soil Amendments: Based on your soil test, add the necessary amendments. Common additions include compost for organic matter, sand for better drainage, starter fertilizer for nutrient boost, and lime to adjust pH levels. Mix these into the soil thoroughly.
Think of this step as setting the stage for your sod to perform its best. The better your soil, the healthier your lawn will be.
Leveling Your Lawn
Now that your soil is enriched and loose, it’s time to level it out.
- Iron Rake: Use an iron rake to smooth out the surface. This helps eliminate high spots and fill in low spots, creating an even base for your sod.
- Paved Surfaces: Make sure the soil is about an inch below any paved surfaces like driveways or patios. This prevents the edges of your new sod from degrading over time.
Leveling ensures that your sod will lay flat and look even, making mowing easier and preventing water from pooling in low areas.
Once your ground is prepared, you’re ready for the next step: laying the sod. But remember, the success of your sod starts with a well-prepared base. So take the time to get it right!
How to Lay Sod Correctly
Once your ground is ready, it’s time to lay the sod. This step is crucial to ensure your new lawn looks great and stays healthy. Let’s break it down into simple steps.
Starting with a Straight Edge
Begin by laying your sod along the longest straight edge in your yard. This could be along a fence line, patio, or even the side of your house. Starting straight helps keep everything aligned and makes the rest of the process easier.
- Yard Edges: Align the first row of sod tightly against yard edges for a clean look.
- Patios and Driveways: Ensure the sod is level with paved surfaces to prevent drying out.
Staggering the Rows
For the second row, cut the first piece of sod in half. This creates a brick pattern and prevents the seams from lining up. Staggering the seams helps retain moisture and keeps the sod from drying out.
- Brick Pattern: Think of it like laying bricks. This pattern strengthens the lawn and helps the sod knit together.
- Seams: Always butt the pieces snugly together without overlapping to avoid gaps.
Cutting and Fitting Sod
Use a sharp knife to cut sod around obstacles like in-ground sprinklers or planting beds. This ensures a neat fit and prevents any gaps where weeds might grow.
- Knife: A utility knife or grass shears work well for precise cuts.
- Avoiding Gaps: Gaps can lead to root rot or dry patches, so fit the sod tightly.
By following these steps, you’ll ensure that your sod is laid correctly, leading to a lush, healthy lawn.
Next, we’ll dive into watering and caring for your new sod to keep it thriving.
Watering and Caring for New Sod
Once your sod is in place, the next step is ensuring it gets the right care. Proper watering and mowing are key to a thriving lawn.
Initial Watering
Start by watering your sod immediately after laying it. This helps the soil settle and ensures good contact between the sod and the ground. Water generously to kick-start root growth.
- Daily Watering: For the first week, water the sod every day. This keeps the sod moist and helps it adjust to its new environment.
- Morning Irrigation: Water in the morning to reduce evaporation and minimize the risk of fungal diseases. Morning watering helps the grass dry out during the day, which is healthier for the lawn.
Ongoing Care and Mowing
After the initial week, adjust your watering schedule to every other day for the second week, then taper to twice a week by the third week. This encourages the roots to grow deeper, seeking water in the soil.
- Water Schedule: Aim for about an inch of water per week after the sod is established. Adjust based on rainfall or local climate conditions.
When it comes to mowing, wait until the grass is about 3 inches tall before the first cut. Use a walk-behind mower to reduce stress on the young roots.
- Grass Height: Keep grass at about 2 inches high after the first mow. This height helps establish a strong root system.
- Clipping Management: Leave the clippings on the lawn to add nutrients back into the soil. This practice is known as mulching and can help reduce the need for additional fertilizers.
By following these guidelines, you’ll ensure your sod establishes well and grows into a lush, healthy lawn.
Next, we’ll explore the best timing for planting sod to maximize success.
When to Plant Sod: Timing for Success
Timing is everything when it comes to planting sod. Knowing the best seasons and avoiding common pitfalls ensures your lawn has the best start possible.
Best Seasons for Planting Sod
Spring and Fall are the ideal times to plant sod for most regions. These seasons offer moderate temperatures and consistent rainfall, which are perfect for sod establishment.
- Spring: With warming temperatures and increased daylight, spring provides a great environment for sod to root quickly. However, be mindful of late frost, which can stress new sod. Start planting after the last frost date for your area.
- Fall: Cooler air and warm soil create optimal conditions for sod to establish strong roots. Planting in fall gives sod time to grow before it goes dormant in winter. This is particularly beneficial for cool-season grasses like Kentucky bluegrass and perennial ryegrass.
Avoiding Common Timing Mistakes
Planting sod at the wrong time can lead to several issues, including weed competition and dormancy problems.
- Weed Competition: Laying sod in late spring or early summer can lead to increased weed growth. Warmer temperatures encourage weeds to germinate and compete with your new sod for nutrients. To avoid this, use a pre-emergent herbicide before planting.
- Dormancy Issues: Be cautious of planting warm-season grasses like Bermudagrass and Zoysia too late in the fall. These grasses go dormant in cooler weather and may not establish well if planted too late. Aim to plant them in late spring to early summer when temperatures are consistently warm.
- Climate Considerations: Your local climate plays a significant role in timing. In warmer climates, sod can be laid almost year-round, while cooler regions may have more specific planting windows. Always consider your area’s typical weather patterns and consult with local experts if unsure.
By understanding the best seasons and avoiding common mistakes, you can ensure your sod takes root effectively and flourishes. Next, we’ll address some frequently asked questions about planting sod.
Frequently Asked Questions about Planting Sod
Can I Lay Sod Over Old Grass?
No, it’s not recommended to lay sod over old grass. Sod needs direct contact with the soil to establish roots and thrive. Placing it over existing grass can prevent proper rooting and lead to nutrient competition. To prepare the area, remove the old grass using a sod cutter. This ensures a flat, even surface for your new sod to grow and flourish. For safety, remember to call your local utilities service to mark any underground lines before you begin.
How Much Does It Cost to Lay Sod?
The cost of laying sod varies depending on several factors, such as the size of your lawn and the type of grass you choose. On average, sod costs between $0.31 to $0.82 per square foot. If you hire professionals, expect to pay about $0.86 to $1.75 per square foot, which includes both labor and materials. For a 50-foot by 20-foot area, the project might cost between $400 and $600. While sod is more expensive than grass seed, it provides an instant, lush lawn, saving you time and effort in the long run.
How Long Until My Sod Is Fully Established?
Newly planted sod typically takes two to three weeks to establish initial roots. During this period, keep the sod well-watered to help it settle. You should avoid walking on it to prevent damage. After about four to six weeks, the roots should be firmly anchored, and you can start regular lawn care practices, like mowing and fertilizing. Patience is key, as rushing the process can harm your lawn’s development. Once established, your sod will provide a beautiful, green space for years to come.
Conclusion
Planting sod can transform your outdoor space into a lush green oasis. However, achieving that perfect lawn requires careful preparation and attention to detail. While some homeowners may choose to tackle the project themselves, seeking professional help can make the process smoother and more efficient.
Professional Help
Engaging a professional service ensures that your sod installation is done right the first time. Experts have the tools and experience to handle every step, from soil preparation to the final watering. This expertise not only saves you time but also helps prevent common mistakes that can lead to costly repairs down the line. Professional landscapers can also offer valuable advice on maintaining your new lawn, ensuring it remains healthy and vibrant.
Personalized Service
At MAS Landscaping and Snow Removal, we pride ourselves on providing personalized service custom to your specific needs. Our team listens to your vision and works closely with you to bring it to life. Whether you need help choosing the right type of sod or advice on the best care practices, we are here to assist every step of the way. Our local knowledge and commitment to excellence mean you can trust us to deliver a beautiful, functional outdoor space that reflects your personal taste.
Ready to transform your yard with expert sod installation? Contact MAS Landscaping and Snow Removal today to get started on your journey to a stunning, green lawn. Let us help you create an outdoor space you’ll love for years to come.
