Cost to Install New Lawn Sod: 2025’s Top Value Breakdown
Why Understanding Sod Installation Costs Matters for Your Property Investment
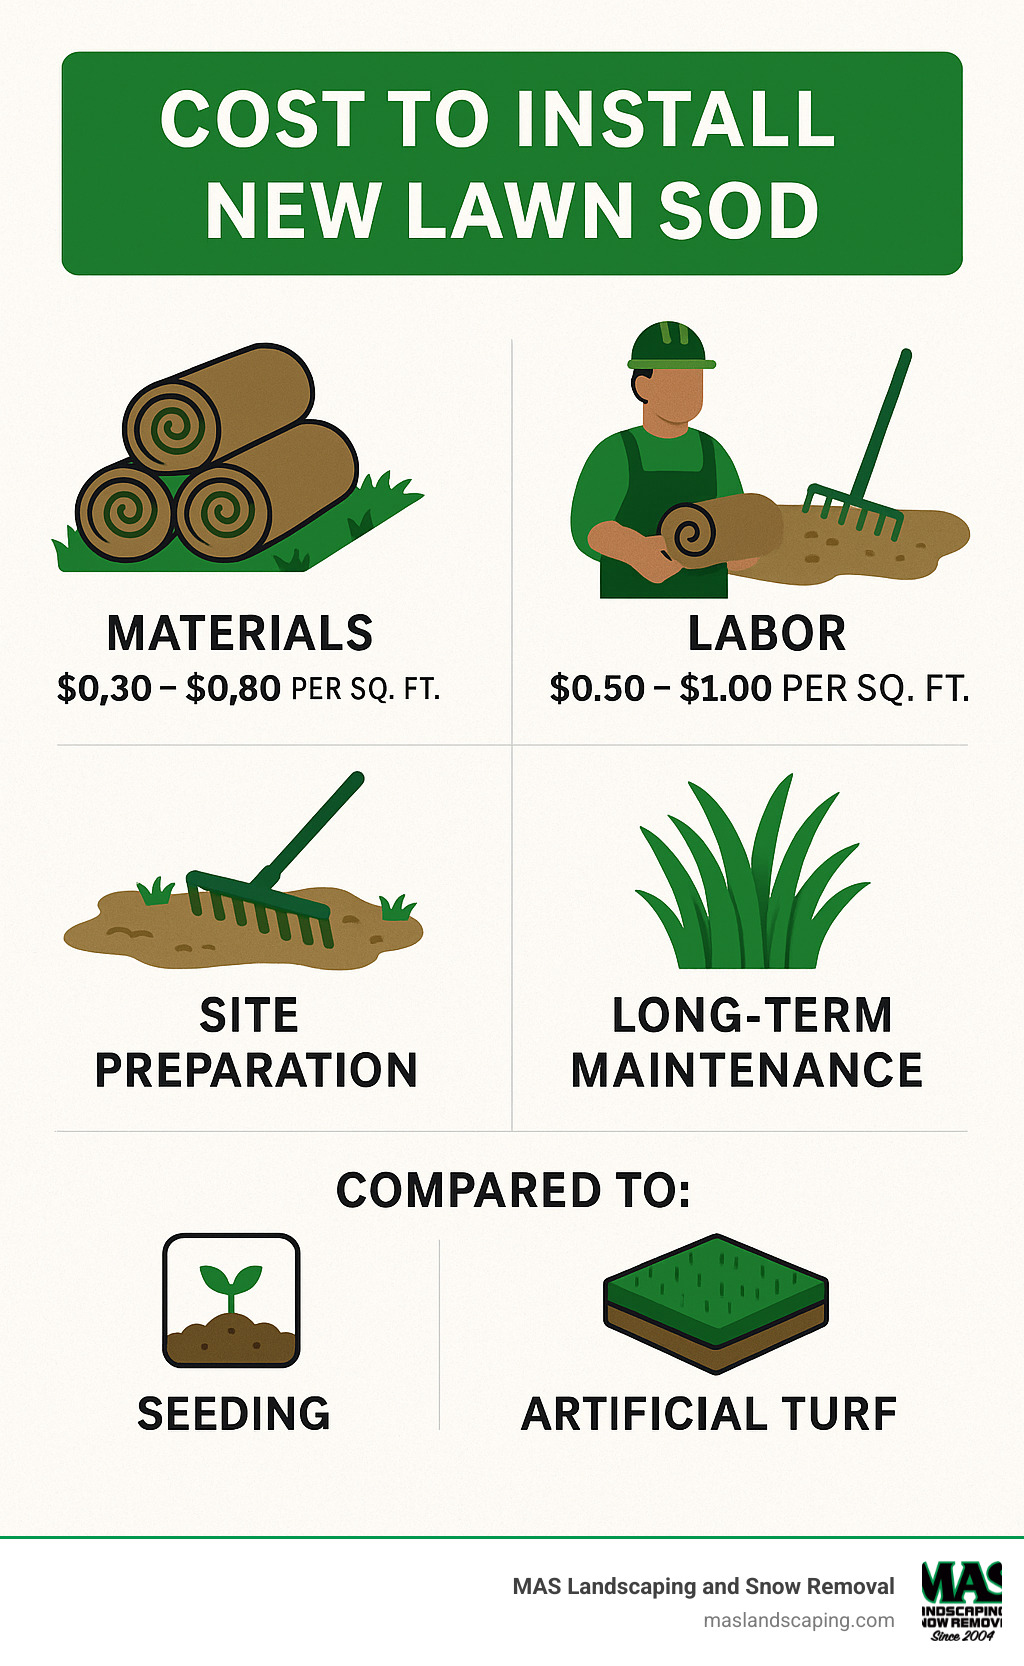
The cost to install new lawn sod varies widely based on your yard size, grass type, and site conditions. Here’s what you need to know:
Quick Cost Overview:
– Sod material only: $0.31 – $0.82 per square foot
– Professional installation: $0.86 – $1.75 per square foot
– Average project cost: $1,048 – $2,992 for most homeowners
– Large yard (⅕ acre): $7,492 – $15,246 installed
Whether you’re staring at a patchy lawn that’s become “the worst on the block” or planning a complete yard change, sod offers an instant solution that grass seed simply can’t match. Unlike seeding, which takes months to establish and often fails in high-traffic areas, sod gives you a lush, usable lawn in just 2-3 weeks.
The investment goes beyond the initial price tag. Professional installation ensures proper soil preparation, correct laying technique, and reduces the risk of costly do-overs that plague many DIY attempts. Research shows that poorly installed sod can fail within the first year, essentially doubling your costs.
For Greater Boston homeowners, understanding these costs upfront helps you budget effectively and avoid the sticker shock that comes with last-minute pricing surprises. The difference between a basic installation and a premium job with soil amendments and irrigation can be substantial.
Quick cost to install new lawn sod definitions:
– best fertilizer for new sod
– how to prepare ground for sod
– cost of new lawn irrigation system installation
What Is the True Cost to Install New Lawn Sod in 2025?
The cost to install new lawn sod varies dramatically across the country, and understanding these ranges helps you plan your budget realistically. Based on internet data, the national average sits around $2,010 for most residential projects, though homeowners typically spend anywhere from $1,048 to $2,992 for their complete lawn change.
Here’s what makes these numbers so interesting: raw sod material runs between $0.31 and $0.82 per square foot, but professional installation jumps to $0.86 to $1.75 per square foot. That difference isn’t just contractor markup—it includes skilled labor, specialized equipment, proper site preparation, and the expertise that prevents those costly “oops” moments that can derail a project.
The extreme high end tells a different story entirely. Premium installations with extensive site work, luxury grass varieties, or challenging terrain can easily triple these averages. We’re talking about projects that can reach $45,000 or more for large properties with complex requirements.
For our neighbors here in the Greater Boston area, a typical ⅕-acre property (about 8,712 square feet) shows material costs ranging from $2,701 to $7,144, with total installed costs spanning $7,492 to $15,246. These numbers might make you pause, but consider this: you’re getting an instant lawn that would take 18 months to achieve through seeding—and that’s assuming the seeding actually works.
Canadian homeowners face slightly different pricing patterns, with residential sod replacement averaging $1.80 to $3.50 per square foot. This higher range reflects currency differences and varying regional labor costs across provinces.
More info about new lawn costs
Cost to Install New Lawn Sod Per Square Foot
Understanding the per-square-foot breakdown reveals why professional installation makes financial sense for most homeowners. Material costs represent only about 35-50% of your total investment, with labor and site preparation accounting for the rest.
Sod typically arrives in pallets covering 400-700 square feet, with each pallet averaging around $265 based on internet pricing data. That translates to roughly $0.38-$0.66 per square foot for the grass itself. However, regional labor rates significantly impact your final investment.
In markets similar to Greater Boston, professional labor rates range from $37 to $78 per hour, or about $0.55 to $0.93 per square foot. These rates reflect the skilled nature of proper sod installation—this isn’t just about rolling out grass like a carpet.
Professional installers bring expertise that saves money long-term. They understand how to grade surfaces for proper drainage, create seamless joints that won’t separate over time, handle irregular shapes and obstacles efficiently, ensure proper soil contact for root establishment, and time installation to maximize success rates.
The gap between DIY material costs and professional installation often surprises homeowners. While you might save on labor initially, equipment rental, delivery fees, and the potential for costly mistakes often narrow that savings considerably.
Total Yard Example: Calculating the Cost to Install New Lawn Sod for 8,712 sq ft
Let’s walk through a realistic example that many homeowners face: installing sod on a typical ⅕-acre residential lot of 8,712 square feet. This breakdown shows how costs add up in the real world.
Material calculation starts with the basics: 8,712 square feet multiplied by $0.31-$0.82 per square foot equals $2,701-$7,144 for the sod itself. But here’s where inexperienced planners make their first mistake—they forget about waste.
The 10% waste allowance isn’t optional. Curved edges, obstacles like trees and walkways, and the need for custom cuts all contribute to material waste. Add $270-$714 to your material budget, bringing your total materials to $2,971-$7,858.
Professional installation for this size project ranges from $7,492-$15,246 based on average internet pricing data. This includes labor, materials, basic site preparation, and professional expertise.
High-end premium work can triple these numbers. Projects requiring extensive grading, premium grass varieties, irrigation system integration, or challenging access can reach $45,000 or more. These aren’t typical jobs, but they represent what’s possible when dealing with complex terrain or luxury specifications.
The wide range reflects the reality of sod installation costs. A straightforward job on prepared, accessible ground hits the lower end, while projects requiring extensive site work or premium materials push toward the higher ranges.

Key Cost Drivers & Long-Term Value Considerations
When you’re planning your sod installation, understanding what drives the cost to install new lawn sod helps you make smart decisions about your investment. It’s not just about the grass itself—several factors work together to determine your final price tag.
Yard size obviously matters, but here’s something many homeowners don’t realize: a perfectly rectangular lawn costs significantly less per square foot than one with curves, islands around trees, or irregular shapes. Those custom cuts and detailed work add up quickly in labor time.
The type of sod you choose makes a huge difference too. Premium varieties like Zoysia can cost 40-60% more than basic Kentucky Bluegrass, but they often save money in the long run through reduced maintenance needs and better durability.
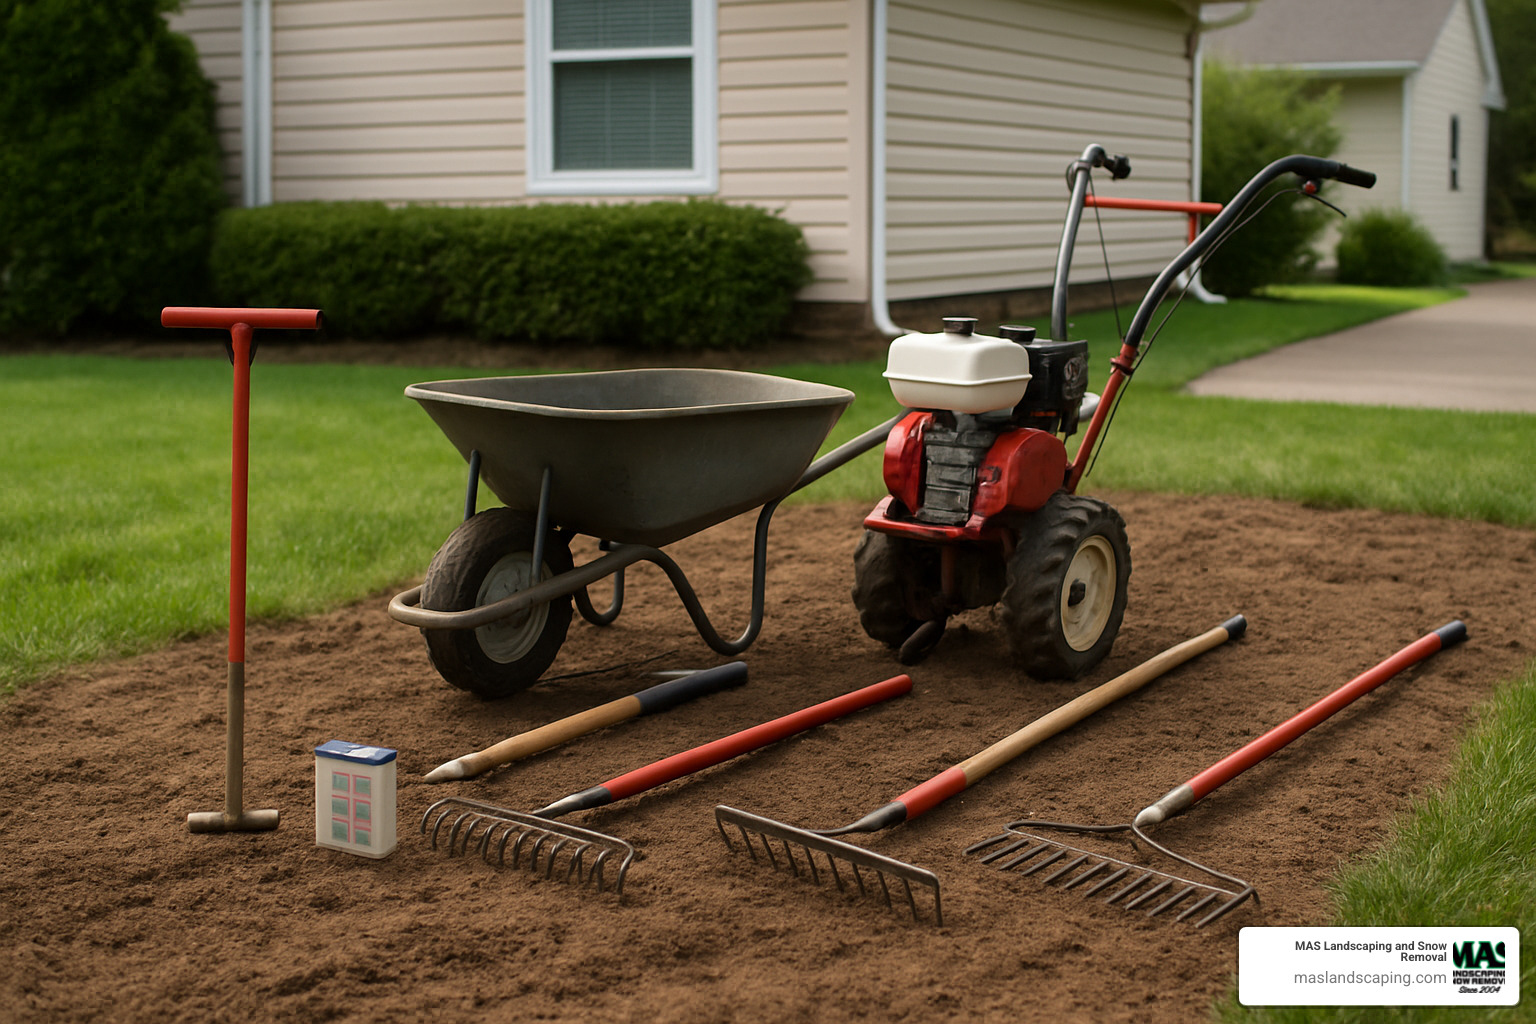
Site preparation represents the biggest variable in most projects. A flat, well-drained yard with good soil might need minimal prep work. But if you’re dealing with poor drainage, steep slopes, or rocky soil, your labor costs can easily double. We’ve seen projects where site prep took longer than the actual sod installation.
Delivery logistics also impact your bottom line. Distance from the sod farm, accessibility of your property, and timing all affect delivery fees. If the delivery truck can’t get close to your yard, expect additional costs for hand-carrying the sod.
Existing conditions play a major role too. Removing old, dead grass adds significant cost to your project, but it’s usually worth it. Trying to lay new sod over existing grass almost always leads to problems down the road.
The long-term value equation tells an interesting story. Quality sod installation typically lasts 15-20 years with proper care, while installations that cut corners often need replacement within 2-3 years. When you factor in ongoing maintenance costs—fertilization, watering, and periodic aeration—professional installation often proves more economical over time.
Research from UC Davis confirms what we see in the field: proper installation technique dramatically impacts long-term success rates. Their studies show that professionally installed sod has a 90%+ establishment rate compared to 60-70% for DIY installations. That difference can save you thousands in replacement costs.
Scientific research on sod installation
| Method | Initial Cost/sq ft | Establishment Time | 5-Year Success Rate | Maintenance Level |
|---|---|---|---|---|
| Professional Sod | $0.86-$1.75 | 2-3 weeks | 90%+ | Moderate |
| DIY Sod | $0.50-$1.20 | 3-6 weeks | 60-70% | High |
| Seeding | $0.09-$0.19 | 3-6 months | 40-60% | Very High |
| Artificial Turf | $5.00-$12.50 | Immediate | 95%+ | Very Low |
Grass Type & Price Range
Choosing the right grass type significantly impacts both your upfront costs and long-term maintenance requirements. Each variety has distinct characteristics that affect pricing, and understanding these differences helps you make the best choice for your specific situation.
Kentucky Bluegrass remains the gold standard for New England lawns. It creates that classic, dense carpet appearance that looks great in photos and feels wonderful underfoot. The grass handles foot traffic well and recovers nicely from damage, making it ideal for families with kids or pets. However, it does require consistent watering and regular fertilization to maintain its best appearance.
Fescue varieties offer excellent drought tolerance, making them increasingly popular with homeowners who want a beautiful lawn without the high maintenance. Tall fescue, in particular, stays green longer during dry spells and handles foot traffic exceptionally well. It doesn’t create quite as dense a carpet as bluegrass, but many homeowners prefer the lower water requirements.
Zoysia grass represents the premium option that many consider the “ultimate lawn solution.” Its drought tolerance, natural disease resistance, and ability to crowd out weeds make it attractive to homeowners who want a low-maintenance, high-performance lawn. The main drawback is slower establishment—Zoysia takes a bit longer to fill in completely compared to other varieties.
St. Augustine grass works well in specific situations, particularly in warmer microclimates or areas with partial shade. While not commonly used throughout Massachusetts, it can be worth considering for protected southern exposures or challenging light conditions where other grasses struggle.
The price differences between grass types reflect both the cost of growing these varieties and their performance characteristics. Premium grasses often justify their higher initial cost through reduced maintenance requirements and better long-term durability.
Site Preparation & Add-On Fees
Site preparation often represents the largest variable in your total project cost. It’s also the area where cutting corners causes the most problems later. A well-prepared site creates the foundation for sod that thrives for decades, while poor preparation leads to grass that struggles from day one.
Soil testing might seem like a small expense, but it prevents expensive failures down the road. We’ve seen beautiful sod installations fail within months because the soil pH was wrong or essential nutrients were missing. A simple soil test identifies these issues before installation, when they’re easy and inexpensive to fix.
Old lawn removal adds to your project cost but almost always pays for itself in better results. It’s tempting to try laying new sod directly over existing grass, but this shortcut leads to poor root establishment and eventual failure. Professional removal ensures your new sod has direct contact with the soil it needs to establish strong roots.
Topsoil addition becomes necessary when your existing soil is poor quality or heavily compacted. Adding 3-4 inches of quality topsoil creates the foundation for healthy root development. While this can significantly increase project costs for larger yards, it dramatically improves long-term success rates and reduces maintenance headaches.
Sprinkler system installation represents a significant upfront investment that pays dividends over time. Installing irrigation during sod installation costs less than retrofitting later, and it takes the guesswork out of proper watering. Since many sod failures result from inconsistent watering rather than poor installation, automatic irrigation can protect your entire investment.
Aeration services help compacted soils accept new roots more readily. For heavily trafficked areas or clay soils common in our region, pre-installation aeration significantly improves establishment rates and long-term lawn health.
These preparation services might seem expensive upfront, but they’re really investments in your sod’s long-term success. Homeowners who invest in proper site preparation consistently have fewer problems and lower long-term maintenance costs than those who try to cut corners during installation.
DIY vs. Professional Installation: Numbers, Steps & Timeline
The cost to install new lawn sod gets complicated when you’re weighing the DIY route against hiring professionals. It’s not just about the money—though that matters too. The reality is that installing sod is backbreaking work that requires more skill than most homeowners realize.
Here’s what surprised many of our clients who initially considered DIY: tool rental alone costs between $330-$420 for a weekend. You’ll need a sod cutter, rototiller, roller, and various hand tools. The catch? Rental equipment is often beat up and doesn’t work like it should. We’ve watched frustrated homeowners battle dull sod cutters and temperamental tillers, which leads to poor ground prep and ultimately, struggling grass.
The physical demands are no joke either. Installing 1,000 square feet means moving roughly 2,000 pounds of sod. Each piece weighs 15-20 pounds, and you need to handle it carefully to avoid tears and air pockets. Most homeowners underestimate this until they’re halfway through day one with aching backs and blistered hands.
Professional installation eliminates these headaches while bringing expertise that prevents costly mistakes. Our crews typically finish residential jobs in 1-2 days, while weekend DIY projects often stretch across 2-3 weekends. The grass doesn’t wait—sod needs to be installed within 8 hours of harvesting or it starts dying.
The good news is that rooting timelines stay the same regardless of who installs. Roots start developing within days, but full establishment takes 2-6 weeks. However, professionally installed sod usually establishes faster because of better soil prep and proper laying techniques like the brick pattern that prevents ugly seams.
More info about Sod Installation
DIY Breakdown vs. Pro Quote for the Cost to Install New Lawn Sod
Let’s break down real numbers for a typical 1,000 square foot project, based on average market data (not MAS Landscaping’s specific pricing):
DIY costs add up faster than expected. You’re looking at sod material costs, tool rental fees of $330-$420, delivery charges, and soil amendments. The total DIY investment typically ranges from moderate to surprisingly high when you factor in everything needed for success.
Professional installation includes complete service with site preparation expertise and proper equipment. The labor rates of $0.55-$0.93 per square foot reflect skilled work—not just rolling out grass, but creating the foundation for long-term success.
Here’s what many homeowners miss: delivery timing becomes critical with DIY. Sod farms harvest fresh grass for delivery, and you must install it the same day. Professional installers coordinate this seamlessly, while DIY installers often feel rushed and make mistakes under time pressure.
The cost difference narrows considerably when you value your time and consider the risk of do-overs. We’ve seen DIY installations fail within months, essentially doubling the homeowner’s investment. Professional installation typically includes delivery coordination, proper equipment, site preparation expertise, and often a guarantee on the work.
Step-by-Step Workflow & 6-Week Care Schedule
Whether you go DIY or professional, understanding the proper process helps ensure your cost to install new lawn sod doesn’t turn into a costly mistake. Here’s how successful installations actually work:
The week before installation involves soil testing, removing existing grass, grading for proper drainage, and final soil preparation. This groundwork determines whether your new sod thrives or struggles. Skipping these steps is like building a house without a foundation.
Installation day starts with final site inspection and coordinated sod delivery. The grass gets laid in a brick pattern, starting with straight edges and working systematically across the area. Each piece needs proper soil contact, which is why rolling comes next. Then comes the critical first watering—1-2 inches immediately after installation.
The first two weeks are make-or-break time. Daily watering for 1-2 hours each morning keeps the sod consistently moist without waterlogging. This is when roots are desperately trying to establish contact with your soil. Miss a day during hot weather, and you’ll see brown patches that may never recover.
Week three allows you to reduce watering to every other day for 2-3 hours. You should see uniform color and growth patterns by now. Week four means watering every third day while watching for the first mowing opportunity when grass reaches 3.5 inches.
Weeks five and six transition to weekly watering sessions of 3-4 hours. Your first mowing should cut to 2.5-3 inches using sharp blades—dull mower blades can damage new grass and create entry points for disease.
By month two or three, you can transition to normal watering based on weather conditions. The sod should be fully established and ready for regular maintenance by month six, when you can begin a full fertilization program.
This timeline assumes decent weather conditions. Hot, dry spells require more frequent watering, while cool, wet periods might allow you to back off. The key is staying flexible while maintaining consistency during that critical establishment period.
Frequently Asked Questions about the Cost to Install New Lawn Sod
When is the most budget-friendly season to lay sod?
If you’re looking to save money on your cost to install new lawn sod, timing is everything. Late summer to early fall typically offers the best deals for cool-season grasses like those we commonly use here in Massachusetts.
During these shoulder months, sod farms are eager to clear their inventory before winter hits. We’ve noticed savings that can make a real difference in your budget—sometimes 10-20% less than what you’d pay during the spring rush. Plus, Mother Nature lends a helping hand with cooler temperatures and more frequent rainfall, which means your wallet won’t take as big a hit on watering costs during those critical first few weeks.
Spring installation might seem like the obvious choice, but it comes with premium pricing because everyone else has the same idea. Don’t get us wrong—spring works great if you don’t mind paying peak prices. Your sod gets a full growing season to establish before facing winter stress.
Summer installations are possible but require serious dedication to watering, and winter? Well, frozen ground and dormant grass don’t exactly make for ideal conditions. For the best combination of savings and success rates, stick with that late summer to early fall sweet spot.
How long before I can walk on my new sod without risking my investment?
This is probably the hardest part for most homeowners—especially when you’ve got kids or pets who see that beautiful new lawn as their personal playground. The short answer is patience pays off.
Light foot traffic is generally okay after about 2 weeks, but we always recommend waiting 3-4 weeks before normal use. For heavy traffic like children playing soccer or dogs doing their zoomies, give it a full 6 weeks.
Here’s why the waiting game matters: during those first two weeks, your sod is basically just sitting on top of the soil like a green carpet. The roots haven’t had time to dig deep and anchor properly. Walk on it too soon, and you risk shifting the pieces, creating air pockets, or damaging those delicate new roots that are working overtime to establish themselves.
Think of it like a healing wound—disturb it during the critical period, and you’re setting back the entire healing process. For slopes or areas that naturally get more foot traffic, extend that timeline to a full month just to be safe.
You’ll know your sod is ready when you can gently tug on a corner and feel resistance from the roots, and when the color looks uniform across your entire lawn. If some sections look stressed or off-color, give them more time to recover.
What mistakes raise the cost to install new lawn sod unnecessarily?
The biggest money-waster we see is overordering sod without proper measurements. Unlike most materials, sod can’t sit around waiting for you to use it, and farms won’t take it back. Get your measurements wrong, and you’re literally throwing money on the compost pile.
Poor site preparation might save you a few dollars upfront, but it’s penny-wise and pound-foolish. Skipping a soil test to save thirty bucks can lead to complete installation failure that requires starting over from scratch. Same goes for trying to lay new sod over existing grass or poorly prepared soil—it’s like building a house on quicksand.
Timing mistakes can turn your dream lawn into an expensive nightmare. Installing sod on Friday afternoon when you’re leaving for a weekend trip, or during a heat wave without proper watering setup, can destroy your entire investment. Professional installers coordinate timing to give your sod the best possible start.
The most heartbreaking failures happen during those critical first two weeks when daily watering is non-negotiable. Vacation plans, broken sprinkler systems, or simply forgetting to water can kill perfectly good sod faster than you’d believe possible.
We’ve seen all these mistakes lead to complete re-sodding projects that essentially double the original cost to install new lawn sod. Whether you go DIY or professional, avoiding these common pitfalls protects your investment and saves you from having to explain to your neighbors why you’re installing a lawn twice.

Conclusion
Planning for the cost to install new lawn sod requires looking beyond the sticker price to understand what creates lasting value. After helping hundreds of homeowners throughout Everett, Lynnfield, Malden, and surrounding communities transform their outdoor spaces, we’ve seen how the right approach makes all the difference.
Your investment in professional sod installation creates immediate curb appeal that takes years to achieve through seeding—if seeding succeeds at all. More importantly, a properly installed lawn becomes a functional outdoor space where families gather, children play, and memories are made. That’s value you can’t put a price on.
The wide range in installation costs reflects the reality that every yard is different. Basic installations on well-prepared ground cost significantly less than projects requiring extensive site work, premium grass varieties, or challenging access. Understanding these variables helps you budget realistically and avoid surprises.
Whether you’re considering DIY installation or professional services, success comes down to getting the fundamentals right: proper soil preparation, correct grass selection for your specific conditions, precise installation technique, and committed post-installation care. Skip any of these steps, and you risk turning your investment into an expensive lesson.
At MAS Landscaping and Snow Removal, our local expertise makes the difference between a good installation and a great one. We understand New England’s unique challenges—from clay soils to unpredictable weather patterns—and know which grass varieties thrive in our climate. This knowledge helps ensure your new lawn not only looks beautiful immediately but continues to flourish for decades.
The cost to install new lawn sod represents more than an expense—it’s an investment in your property’s beauty, functionality, and long-term value. When planned carefully and executed properly, it’s an investment that improves your daily life while building equity in your home.
More info about Grass Installation
