how to care for new sod: 10 Proven Tips for Stunning Results 2025
Changing Your Yard with New Sod: The First Critical Weeks
Understanding how to care for new sod is like bringing home a newborn – those first few weeks demand special attention that sets the stage for long-term health. Your gorgeous green carpet isn’t just a quick landscaping fix; it’s a living investment that needs proper nurturing from day one.
That beautiful, instant lawn you’ve just installed is actually in recovery mode. It’s been harvested, rolled up, transported, and laid down in a completely new environment – your yard! Without its established root system, your sod needs your help to settle into its new home.
“When you think you watered it enough, you’re almost halfway there,” is what I tell all our clients at MAS Landscaping. This isn’t an exaggeration – consistent moisture is absolutely essential during these early days, but it’s just one piece of the establishment puzzle.
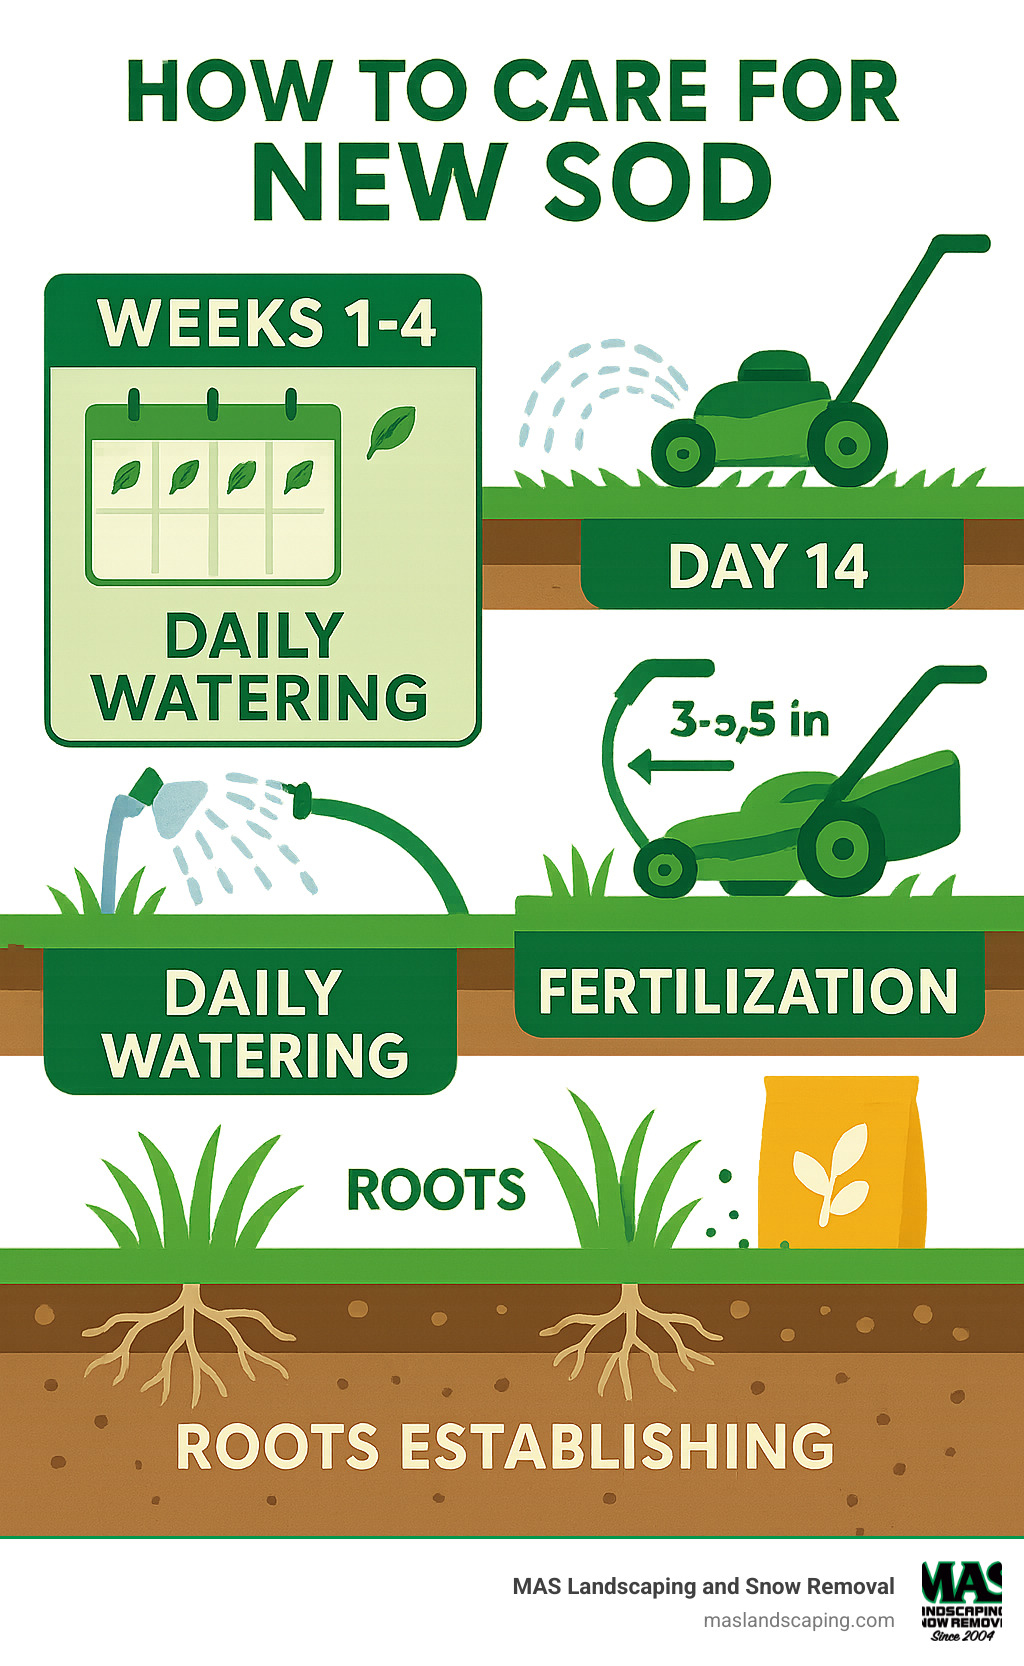
Here’s your quick-reference guide to those crucial first weeks:
| Timeline | Watering | Activities | Key Points |
|---|---|---|---|
| Day 1 | 45-60 minutes immediately after installation | Stay off lawn | Soak soil 4-6 inches deep |
| Days 2-14 | 3-5 times daily, 15-20 minutes each | No foot traffic | Keep consistently moist |
| Day 14 | Reduce before mowing | First mow when 3-3.5 inches tall | Cut no more than 1/3 of blade |
| Weeks 3-4 | Reduce to once daily, then every other day | Limited foot traffic | Roots are establishing |
| After 4 weeks | 1 inch per week | Normal use | Fertilize at 4-6 weeks |
Unlike an established lawn that bounces back from stress, your new sod has limited resources and shallow roots. Think of those first two weeks as your lawn’s most vulnerable period – it can’t yet fend for itself. Your diligence during this time directly affects whether your grass develops deep, healthy roots or struggles to take hold.
The good news? This intense care period is temporary. With proper attention in these early weeks, your new lawn will establish itself and reward you with years of enjoyment, improved curb appeal, and environmental benefits. The lush, green space you’ve dreamed of is within reach – it just needs your help getting started.
In the coming sections, I’ll walk you through exactly what your new sod needs from day one through that important first mowing and beyond. Whether you’ve just installed sod or are planning to, these field-tested techniques will help ensure your lawn thrives from the start.
How to care for new sod further reading:
– best fertilizer for new sod
– how to prepare ground for sod
– how long does the new lawn installation process take
Prepare the Soil Before the Sod Arrives
The success of your new sod begins long before the first roll touches your yard. Think of soil prep as the foundation of your home—skip it, and everything built on top becomes unstable. Here in New England, our soils vary dramatically from sandy compositions near the coast in Revere to heavy clay in parts of Medford and Malden.
Start with a soil test to understand what you’re working with. Most New England lawns thrive in slightly acidic soil with a pH between 6.0 and 7.0. Your test results might suggest adding lime to raise pH or sulfur to lower it—simple adjustments that make a huge difference.
Next, work 2-3 inches of quality compost into the top 4-6 inches of soil. This isn’t just busywork—it dramatically improves both drainage and nutrient availability, giving your new grass the best possible start.
“Nothing should be left to chance when establishing a new lawn,” our team at MAS Landscaping often tells clients. “A 50/50 mix of sandy loam and organic compost creates an ideal foundation for new sod—it’s like serving your grass a perfect meal right from the start.”
Don’t overlook proper grading—ensure your soil slopes away from your home’s foundation at approximately a 1% grade (about 1-inch drop per 8 feet). This gentle slope prevents water from pooling, which can suffocate roots and invite disease.
Before your sod delivery, lightly pre-water the soil. This simple step lowers ground temperature and prevents the soil from stealing moisture from your new sod—a common issue we see during summer installations in Everett and surrounding towns.
Have your roller ready for installation day. This tool helps eliminate air pockets between the soil and sod, ensuring good contact for faster root establishment.

Why Good Soil Prep = Less Headache Later
Think of soil preparation as an insurance policy for your lawn investment. When we take the time to get this right, we’re creating an environment where nature works with you, not against you.
Beneficial microorganisms become your invisible lawn care team when soil is properly prepared. These tiny helpers break down organic matter and cycle nutrients that feed your grass throughout the seasons. They’re like having thousands of miniature gardeners working 24/7.
Good preparation maximizes root-to-soil contact by eliminating air pockets. This means roots can quickly establish and access water and nutrients without struggling through compacted dirt or air gaps. It’s like the difference between sleeping on a lumpy mattress versus a perfectly smooth one—your grass roots definitely prefer the latter!
Proper soil structure ensures water drainage happens just right—not too fast, not too slow. This prevents the soggy conditions that lead to disease while retaining enough moisture during those dry New England summer weeks.
By loosening the soil properly, you prevent compaction issues before they start. This allows roots to penetrate deeply, creating a drought-resistant lawn that stands up to New England’s unpredictable weather patterns. Deep roots mean less watering and more resilience during those August heat waves.
One of our clients in Lynnfield learned this lesson the hard way. After skipping proper soil preparation, they struggled for months with patchy sod that never fully established. When they later renovated with our team, we corrected the underlying soil issues first. The result? A dramatically healthier lawn that required less water, fewer treatments, and looked lush even during challenging weather.
Remember: you can change your grass type anytime, but fixing soil problems after sod is installed is nearly impossible without starting over. When it comes to how to care for new sod, the work you do before the first piece arrives often determines whether you’ll have a showcase lawn or a constant headache.
Day 0: Watering and Installation Essentials
The day your sod arrives is the beginning of your lawn’s new life. Think of it as bringing home a new plant that needs immediate attention. Ideally, installation should happen right away—sod is living plant material that begins to deteriorate the moment it’s harvested. If there’s a delay, keep the pallets in shade and consider misting them lightly to prevent drying out.
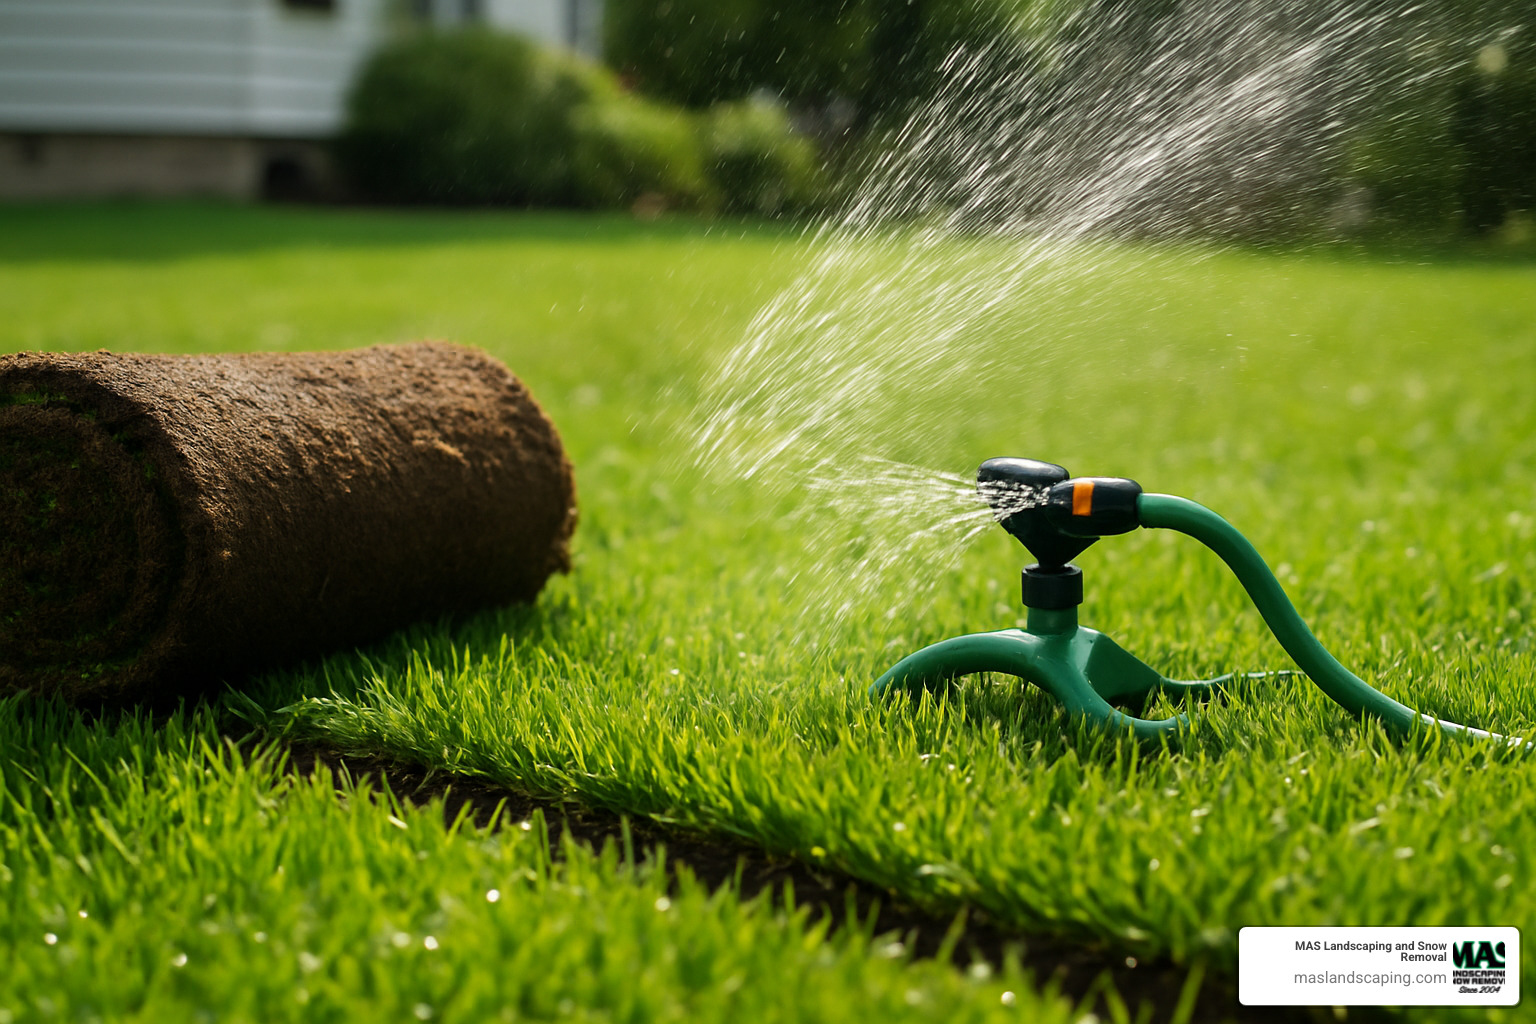
Once the final piece of sod is laid, it’s time for that crucial first watering—perhaps the most important irrigation your lawn will ever receive.
How to care for new sod on installation day requires a thorough, deep soaking:
“You want to create a soil environment that’s absolutely welcoming to those new grass roots,” explains our installation team at MAS Landscaping. “That first watering isn’t just about keeping the grass green—it’s about creating the perfect conditions for roots to establish themselves in their new home.”
Immediately water for a full 45-60 minutes straight. This isn’t being excessive—your goal is to ensure water penetrates completely through the sod and soaks 4-6 inches into the soil beneath. The ground should actually feel soggy underfoot when you’re done. This might seem counterintuitive, but installation day is the one time when overwatering is actually beneficial!
When laying your sod, arrange pieces in a staggered pattern (similar to brickwork) with tight seams but absolutely no overlapping. After installation, use a lawn roller (available at rental centers) to press the sod firmly against the soil. This eliminates air pockets that can dry out roots and significantly slow down establishment.
“Harvesting and transplantation is extremely stressful to any grass,” our team often reminds clients. “That first deep watering helps the plant recover from shock and kickstarts the crucial rooting process.”
Latest research on irrigation depth
How to Care for New Sod in the First 24 Hours
The first 24 hours after installation represent a critical window for your new lawn. During this vulnerable period, the sod hasn’t yet formed any roots into the soil below and is especially susceptible to drying out.
Installation timing matters. When possible, we recommend installing sod in the early morning or late afternoon, especially during summer months in Everett, Malden, and surrounding areas. This reduces heat stress on the freshly cut grass when it’s most vulnerable.
Limit pallet time. The clock starts ticking the moment your sod is harvested. Ideally, it should be installed within 24 hours of harvest. The longer it sits on pallets, the more stress it experiences and the slower it will establish in your yard.
Monitor edges carefully. The perimeter of your lawn and areas adjacent to hardscapes like driveways and walkways dry out faster than the center. These areas often need supplemental hand watering to prevent the edges from curling or browning.
Stay off the lawn completely. Even light foot traffic during the first 24 hours can create depressions and disrupt that critical soil-to-root contact. We know it’s tempting to walk out and admire your new green space, but patience here pays dividends.
Check moisture levels. Before the end of day one, gently lift a corner of sod in several spots around your lawn. The soil underneath should be consistently moist but not swimming in water.
One client in Malden called us in a panic when they noticed the edges of their new sod turning brown the day after installation. We advised them to immediately hand-water those areas, focusing on the seams. This quick intervention saved their lawn from potential failure along the edges—a common issue with new installations that we see throughout Massachusetts.
How to Care for New Sod: Week-by-Week Roadmap
Successful sod establishment isn’t a mystery—it follows a predictable pattern that your new lawn needs you to understand. By recognizing what’s happening beneath the surface during each phase, you can provide exactly what your grass needs when it needs it most.

Week 1 – Keep It Wet, Not Soggy
THIS IS THE MOST CRITICAL PERIOD for your new lawn’s survival. During these first seven days, your sod has minimal root development and depends entirely on surface moisture to stay alive.
Water 3-5 times daily for about 5-10 minutes each session. You’re aiming for that perfect “wrung-out sponge” feeling—consistently moist without creating puddles or soggy conditions.
A typical watering schedule might look something like early morning (10 minutes), mid-morning (5 minutes), early afternoon (5 minutes), mid-afternoon (5 minutes), and early evening (10 minutes). But remember—this isn’t one-size-fits-all. Those shady corners of your yard will need less frequent watering, while sunny spots and areas near pavement may need extra attention.
Need a quick moisture check? Try the footprint test. Simply walk across your lawn and see if your footprints remain visible. If they do, your grass blades aren’t bouncing back because they’re thirsty.
“If you start seeing gaps forming between sod pieces, that’s your lawn waving a red flag,” says our maintenance team at MAS Landscaping. “Those seams should be growing together, not pulling apart from dehydration.”
Scientific research on watering schedule
Week 2 – Prep for First Mow
As week two begins, those roots are developing, but they’re still shallow and fragile—like a toddler just learning to walk. Continue with frequent watering, but you can start easing back slightly:
By now, you can reduce to 3-4 watering sessions daily and begin allowing the surface to dry slightly between waterings. This is also the perfect time to start checking root development by gently lifting a corner of sod in a few spots.
As day 14 approaches, reduce watering slightly to firm up the soil before that important first mow. Your sod should no longer shift when you walk on it, and you should feel some resistance when you gently tug on the grass—signs that roots are establishing.
Keep an eye out for mushrooms or fungus during this period, especially during humid weather. While mushrooms might look concerning, they’re actually signaling healthy soil biology and will disappear as your watering schedule changes. Just avoid evening watering (after 5:30 PM) to reduce disease risk in our New England climate.
Weeks 3-4 – Transition to Deep, Infrequent Watering
Once your sod has received its first haircut, it’s time to transition to a watering schedule that encourages those roots to dig deeper:
Week 3 means watering once daily for a longer 20-30 minute session, while Week 4 shifts to every other day for 30-45 minutes each time.
This change from frequent, light watering to less frequent, deeper soaking is absolutely crucial for long-term lawn health. It’s like training your lawn for the future—roots grow downward searching for moisture, creating a more drought-resistant system that can handle New England’s unpredictable weather patterns.
By the end of week 4, your lawn should require about 1 inch of water per week. You can easily measure this by placing a tuna can or similar container on your lawn during irrigation and checking when it fills to 1 inch.
“Deep, infrequent watering is the secret to a resilient lawn,” explains our irrigation specialist. “Shallow, frequent watering leads to lazy roots that panic during the first dry spell.”
Scientific research on watering schedule
First Mowing, Fertilizing, and Foot-Traffic Milestones
That first mow represents a major turning point in your lawn’s journey. It usually happens around day 14, when your grass reaches that ideal 3-3.5 inch height. This isn’t just about keeping things tidy—that initial trim actually stimulates sideways growth, helping your sod pieces knit together into a seamless carpet of green.
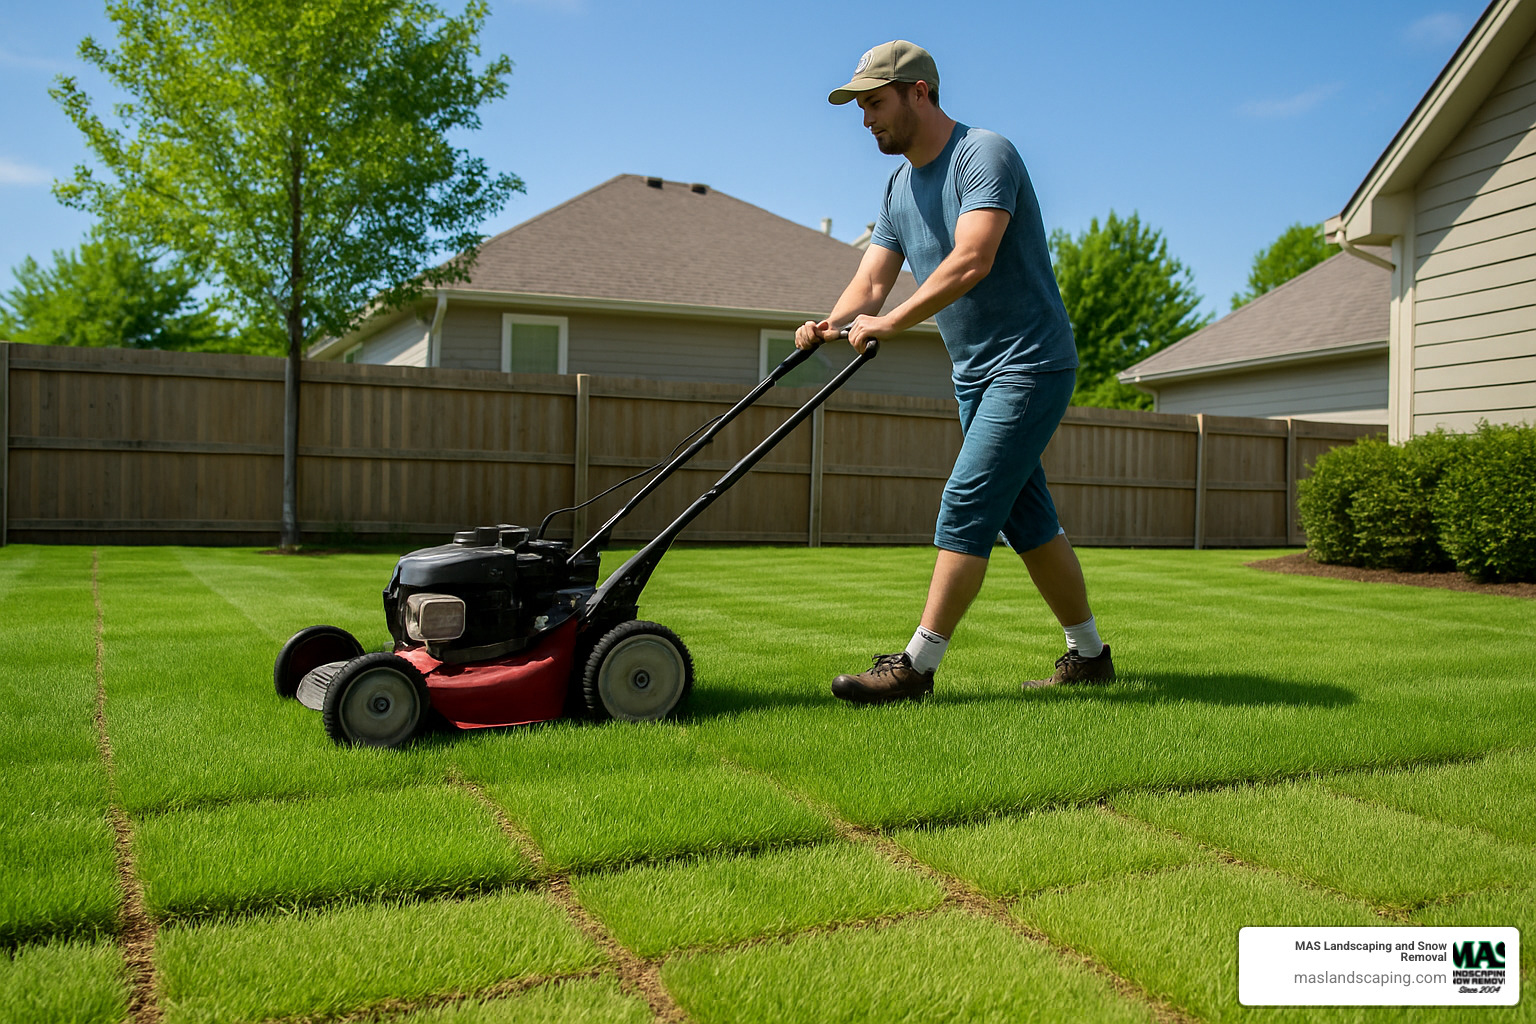
“ALWAYS MOW HIGH,” our team at MAS Landscaping constantly reminds clients. “Never cut more than the top third of the blade off; otherwise, it could stress the plant and cause unsightly browning.” Think of it like a haircut—trim too much at once, and the results aren’t pretty!
For best results, mow when the lawn is relatively dry, typically mid-morning after the dew has evaporated. Make sure your mower blades are razor-sharp to create clean cuts rather than tearing the delicate new grass. For just this first mowing, consider bagging the clippings to reduce any potential disease pressure on your developing lawn.
As for fertilization, patience is key. Hold off until 4-6 weeks after installation, giving those roots time to establish themselves. Going in too early with fertilizer is like serving a five-course meal to someone who just had surgery—their system simply isn’t ready for it yet. When the time comes, select a starter fertilizer with an N-P-K ratio around 18-24-12, which delivers the phosphorus boost needed for strong root development.
Regarding foot traffic, treat your new lawn like you would a “wet paint” sign—stay completely off until after the first mowing. After that initial cut, continue limiting activity for another 2-3 weeks. Your furry friends should have an even longer waiting period—keep pets off new sod for a full month. Their concentrated traffic patterns and urine spots can create lasting damage to vulnerable new grass.
How to Care for New Sod on Mowing Day
The day of your first mow deserves special attention. Here in New England, we’ve seen many a homeowner’s excitement turn to panic when sod pieces start shifting under their mower wheels. To ensure success:
Reduce watering the day before to firm up the soil—you want the ground solid enough to support your mower’s weight. Wait for the lawn to dry completely, as cutting wet grass not only creates messy clumps but can spread disease. Double-check that your mower blade is sharp; dull blades tear grass instead of cutting it cleanly, creating entry points for disease.
For this inaugural trim, consider mowing in a different direction than how the sod was laid. This helps prevent accidentally catching and lifting the edges of pieces that haven’t fully rooted yet.
If you notice any sod pieces shifting during mowing, stop immediately. Press them firmly back into place, adding a little topsoil underneath if needed. It’s always better to err on the side of cutting too high rather than too low during these early mowings.
After that first cut, your lawn might look slightly stressed—perhaps even a bit pale. Don’t worry! This is completely normal, similar to how we might look a bit tired after a haircut. Resume your regular watering schedule, and your lawn will quickly bounce back.
Feeding Your Lawn Without Burning It
Think of fertilizing as your lawn’s first real meal after recovering from transplant surgery. Timing and formula are everything here.
Wait 4-6 weeks before applying fertilizer. This gives roots time to establish themselves before being asked to support more top growth. One Lynnfield client learned this lesson the hard way when they fertilized too early and ended up with patchy burns throughout their beautiful new lawn.
Choose the right formula for this critical first feeding. A starter fertilizer with an 18-24-12 ratio provides balanced nutrition with an emphasis on phosphorus (the middle number) for root development. This is different from maintenance fertilizers you’ll use later.
When deciding between liquid and granular options, consider that liquid fertilizers penetrate more quickly and distribute more evenly across your lawn. “Liquid fertilizers tend to work best for new sod because they penetrate the soil surface more effectively than granular forms,” notes our fertilization team at MAS Landscaping. “This ensures nutrients reach the developing root zone where they’re needed most.”
However, slow-release granular products provide longer-lasting nutrition, requiring fewer applications over time. Either option works well when applied correctly.
Remember to water immediately after fertilizing, regardless of which type you choose. Apply on a calm day to prevent drift, and follow package directions precisely for application rates. Many of our Malden and Everett customers opt for professional application for this first feeding, ensuring proper coverage without risking damage to their investment.
Troubleshooting Common New Sod Problems
Even with perfect care, your new lawn might face some challenges along the way. The good news? Most issues can be easily resolved when caught early. Let’s explore the most common problems we see with newly installed sod in the Saugus area and surrounding communities.
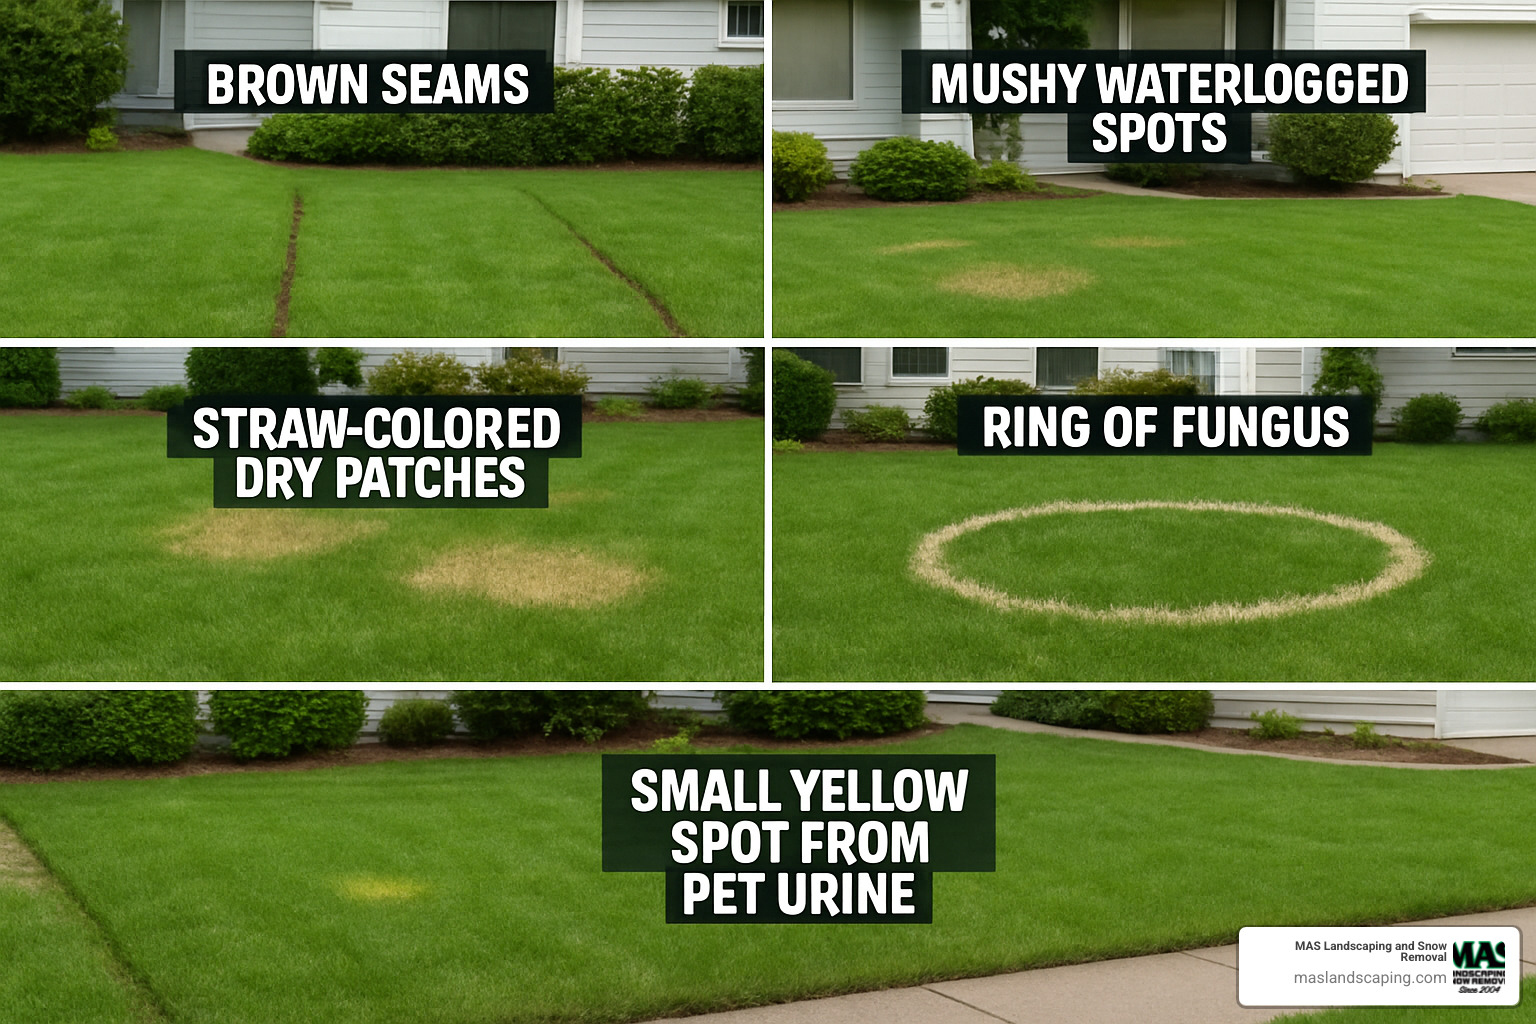
Brown Seams
Those frustrating brown lines where sod pieces meet are usually a simple watering issue. The edges of sod dry out faster than the centers because they have more exposed surface area. I remember a client in Everett who panicked about brown seams just days after installation – a quick adjustment to their sprinkler pattern solved the problem within 48 hours.
“The seams are like the canary in the coal mine,” our installation manager often says. “They’ll show water stress before the rest of the lawn.”
For a quick fix, grab your garden hose and give those seams some extra attention. You might also need to adjust your sprinkler coverage to ensure no areas are being missed.
Mushy Spots
Walking across your new lawn and feeling squishy, soggy areas underfoot? That’s a clear sign of overwatering or poor drainage. These conditions can quickly lead to root rot and fungal issues if not addressed.
Reduce your watering frequency while maintaining adequate depth. If the problem persists, you might need to lift the affected sod pieces, address any drainage issues beneath, and then relay the sod. This is especially common in clay-heavy soils throughout parts of Lynnfield and Malden.
Straw-Colored Areas
When sections of your lawn develop a pale, straw-like appearance, it’s typically a sign of underwatering or heat stress. The good news is that new sod can usually recover from drought stress if you act quickly.
Immediately increase watering to these areas, focusing on deep saturation. In extreme cases, you might need to water these sections 2-3 times daily until they recover. One client in Melrose rescued a badly heat-stressed section by setting up a pulsating sprinkler focused just on the affected area for three days.
Fungal Rings
Those mysterious circular patterns appearing in your lawn? They’re likely fungal colonies, and they love the consistent moisture of new sod. Evening watering is the biggest culprit here, as moisture sitting on grass blades overnight creates ideal conditions for fungal growth.
Adjust your watering schedule to early morning hours, which allows grass blades to dry during the day. In severe cases, you might need a fungicide application, but often simply changing your watering timing resolves the issue.
Pet Damage
Those distinctive brown spots surrounded by lush green grass? That’s your furry friend’s contribution to the landscape! Dog urine contains concentrated nitrogen that essentially “over-fertilizes” small areas, burning the grass.
Create a designated bathroom area for pets during the establishment period. If accidents happen, immediately flush the area with water to dilute the urine. For established pet damage, you may need to replace small sections once your lawn is otherwise healthy.
“Signs of under-watering include grass turning a straw color and cracks appearing between sod seams; these can usually be reversed with immediate watering,” explains our maintenance specialist.
For lawns in the Saugus and surrounding areas, we strongly recommend holding off on any weed control products until after at least three mowings. This gives your grass time to establish before introducing any potential stress from herbicides.
Scientific research on lawn issues
Quick Fixes for Under- or Over-Watering
Water management is where most new sod struggles begin and end. Here’s how to diagnose and correct these common issues:
When your lawn is thirsty, you’ll notice sod pieces actually shrinking slightly, with edges curling up and color shifting from vibrant green to a bluish-green and eventually straw color. The corner lift test will reveal dry soil beneath the sod. The solution is simple but urgent: increase watering duration immediately and hand-water the worst affected areas.
Conversely, overwatered sod feels spongy underfoot, often grows mushrooms, and develops a yellowish tinge. If your soil still feels soggy 30 minutes after watering, you’re overdoing it. Reduce watering duration but maintain frequency during those critical first two weeks.
It’s better to adjust how long you water rather than how often during the establishment period. New sod needs consistent moisture, so multiple short cycles are more effective than fewer long soakings until roots develop properly.
Seasonal “Watch-Outs” for New England Lawns
Our unique New England climate presents specific challenges for new sod throughout the year:
During summer heatwaves when temperatures climb above 90°F, increase watering frequency while keeping durations short. Water very early in the morning (ideally starting around 5:00 AM) to minimize evaporation. Areas near driveways, sidewalks, and south-facing walls need extra attention as heat radiates from these surfaces.
When those famous Nor’easter rains arrive, don’t automatically assume your irrigation duties are covered. Heavy rainfall often runs off before properly soaking in, especially on slopes or compacted soil. Check moisture levels after rain and resume normal watering once the top inch begins to dry.
For late fall installations, continue watering until the ground freezes. Even dormant sod needs moisture during winter thaws. On bright, windy winter days when temperatures rise above freezing, consider light watering if the ground isn’t frozen to prevent winter desiccation.
“In our Melrose and Medford properties, we’ve noticed that slopes and areas exposed to wind dry out much more quickly,” notes our maintenance team. “These microclimates within your yard may need customized watering attention.”
Understanding these common issues and their solutions will help you steer the establishment period with confidence. How to care for new sod isn’t just about following a schedule—it’s about observing your lawn daily and responding to what you see.
Frequently Asked Questions About New Sod Maintenance
How long does it take new sod to root?
That magical moment when your sod truly becomes “your lawn” happens gradually. Within the first 7-14 days after installation, your new sod will begin developing those crucial shallow roots. Think of these initial roots as nature’s velcro – they’re delicate but essential for anchoring your sod to its new home.
“The rooting process is like watching paint dry – you can’t see it happening, but it’s the most important thing taking place,” jokes one of our installation specialists at MAS Landscaping.
You can perform a simple test to check root development: gently pull up on a corner of sod in an inconspicuous spot. Feeling resistance? That’s a good sign roots are beginning their journey downward. By the end of week two, you should feel significant resistance – almost like the lawn is saying “hey, I’m staying put!”
For complete deep root establishment, patience is key. Under ideal conditions, expect this process to take 30-45 days. Weather plays a significant role here – cool spring or fall temperatures may slow things down, while warm summer conditions can accelerate rooting (though summer installations demand vigilant watering to prevent drying).
When is it safe to walk or play on my lawn?
We know how tempting it is to enjoy your beautiful new green space immediately, but restraint pays dividends. Light foot traffic can resume after that milestone first mowing (typically around day 14), but keep activity minimal for an additional 2-3 weeks.
For heavier use – children playing tag, setting up patio furniture, or hosting gatherings – give your lawn a full month to establish. Athletic activities that involve running, pivoting, or concentrated traffic patterns should wait at least 6 weeks.
One of our clients in Revere learned this lesson the hard way when they hosted a graduation party just three weeks after installation. The concentrated foot traffic created depressions and damaged areas that required repair. Their experience reminds us of an important principle: when in doubt, give your lawn more time to establish its root system.
How to care for new sod includes protecting it from premature use – think of your lawn as recovering from surgery. It needs time to heal before resuming normal activities!
Can I use weed killers on fresh sod?
Your new sod arrives virtually weed-free – one of its many advantages! However, weeds are opportunistic and may eventually appear. Resist the urge to immediately reach for herbicides, as young grass is particularly susceptible to chemical stress.
The safest approach is to avoid any weed control products for at least the first three mowings (typically 4-6 weeks after installation). During this establishment period, hand-pulling is your safest weed management strategy.
After the waiting period, start with spot treatments rather than broadcast application. Target only the weedy areas, and choose products specifically labeled as safe for your grass type. Always read product labels carefully – the fine print matters!
“Pre-emergent herbicides are especially problematic for new lawns,” notes our maintenance team. “These should be avoided until your lawn has been established for at least 60 days.”
Many of our Malden and Everett clients are surprised to find that a thick, healthy lawn naturally suppresses weeds – proper watering, mowing, and fertilization create conditions where turf outcompetes most weedy invaders. By focusing on these cultural practices during the establishment period, you’re setting your lawn up for long-term success with fewer chemical interventions.
Conclusion
Creating and maintaining a beautiful lawn isn’t just about aesthetic appeal—it’s about establishing a living ecosystem that improves your home and provides years of enjoyment. Those first few weeks after installation truly set the stage for your lawn’s long-term health and beauty.
How to care for new sod ultimately comes down to understanding the natural progression of grass establishment and working with it, not against it. Your new lawn is like any other living thing—it needs consistent care and attention as it establishes itself in its new environment.
The journey from freshly-laid sod to established lawn requires patience, but the rewards are substantial. There’s nothing quite like the satisfaction of watching your lawn transform from vulnerable transplants to a lush, resilient carpet of green. Each step in the process—from keeping it consistently moist during establishment to that rewarding first mow—brings you closer to lawn perfection.
Deep roots make for drought-resistant lawns. By gradually transitioning from frequent, light watering to deeper, less frequent irrigation, you’re training your grass to develop the robust root system it needs to thrive through New England’s variable weather patterns.
Many of our clients tell us that their lawn care habits changed permanently after establishing new sod. They developed a deeper appreciation for the relationship between soil health, water management, and turf performance. This mindset shift often extends to other aspects of their landscape as well.
Here in the Northeast, we face unique challenges—from summer heat waves to winter freeze-thaw cycles. Your lawn care approach should adapt seasonally, with special attention during extreme weather events. That’s where local expertise becomes invaluable.
At MAS Landscaping and Snow Removal, we’ve guided countless homeowners throughout Everett, Lynnfield, Malden, Melrose, Medford, Revere, Saugus, and Chelsea through the process of establishing beautiful, healthy lawns. We understand the specific challenges of our regional climate and soil conditions.
A thriving lawn is just the beginning of creating your ideal outdoor space. Whether you’re considering a complete landscape redesign or looking to improve what you already have, our team is ready to help transform your vision into reality.
More info about Landscape Design
Your lawn is the canvas upon which all other landscape elements build. With proper care during those critical first weeks, you’ll create a foundation for outdoor enjoyment that will serve you and your family for years to come. We’d be honored to be part of that journey with you.
