Instal Patio Pavers: Top Tips for Perfect Outdoor Spaces
Instal patio pavers to create a stunning and functional outdoor space that requires minimal maintenance. This versatile project not only improves the aesthetic appeal of your home but also increases its value. Whether you’re envisioning a charming patio, a welcoming walkway, or a stylish pool deck, the benefits of installing patio pavers are numerous:
- Durability: Pavers are designed to withstand heavy foot traffic and harsh weather.
- Customization: Choose from various materials like stone, brick, or concrete to match your landscaping vision.
- Low Maintenance: Easy to clean and repair, providing long-lasting beauty.
- Safety: Non-slip surfaces reduce the risk of accidents.
While installing patio pavers can be a rewarding DIY project for those with intermediate skills, enlisting the help of professionals like MAS Landscaping and Snow Removal in the Greater Boston area ensures precise execution and peace of mind. They bring the expertise and experience needed to handle complex layouts and intricate designs, allowing you to enjoy your outdoor oasis without the hassle.
Glossary for instal patio pavers:
– affordable patio
– backyard patio design
– brick patio repair contractors near me
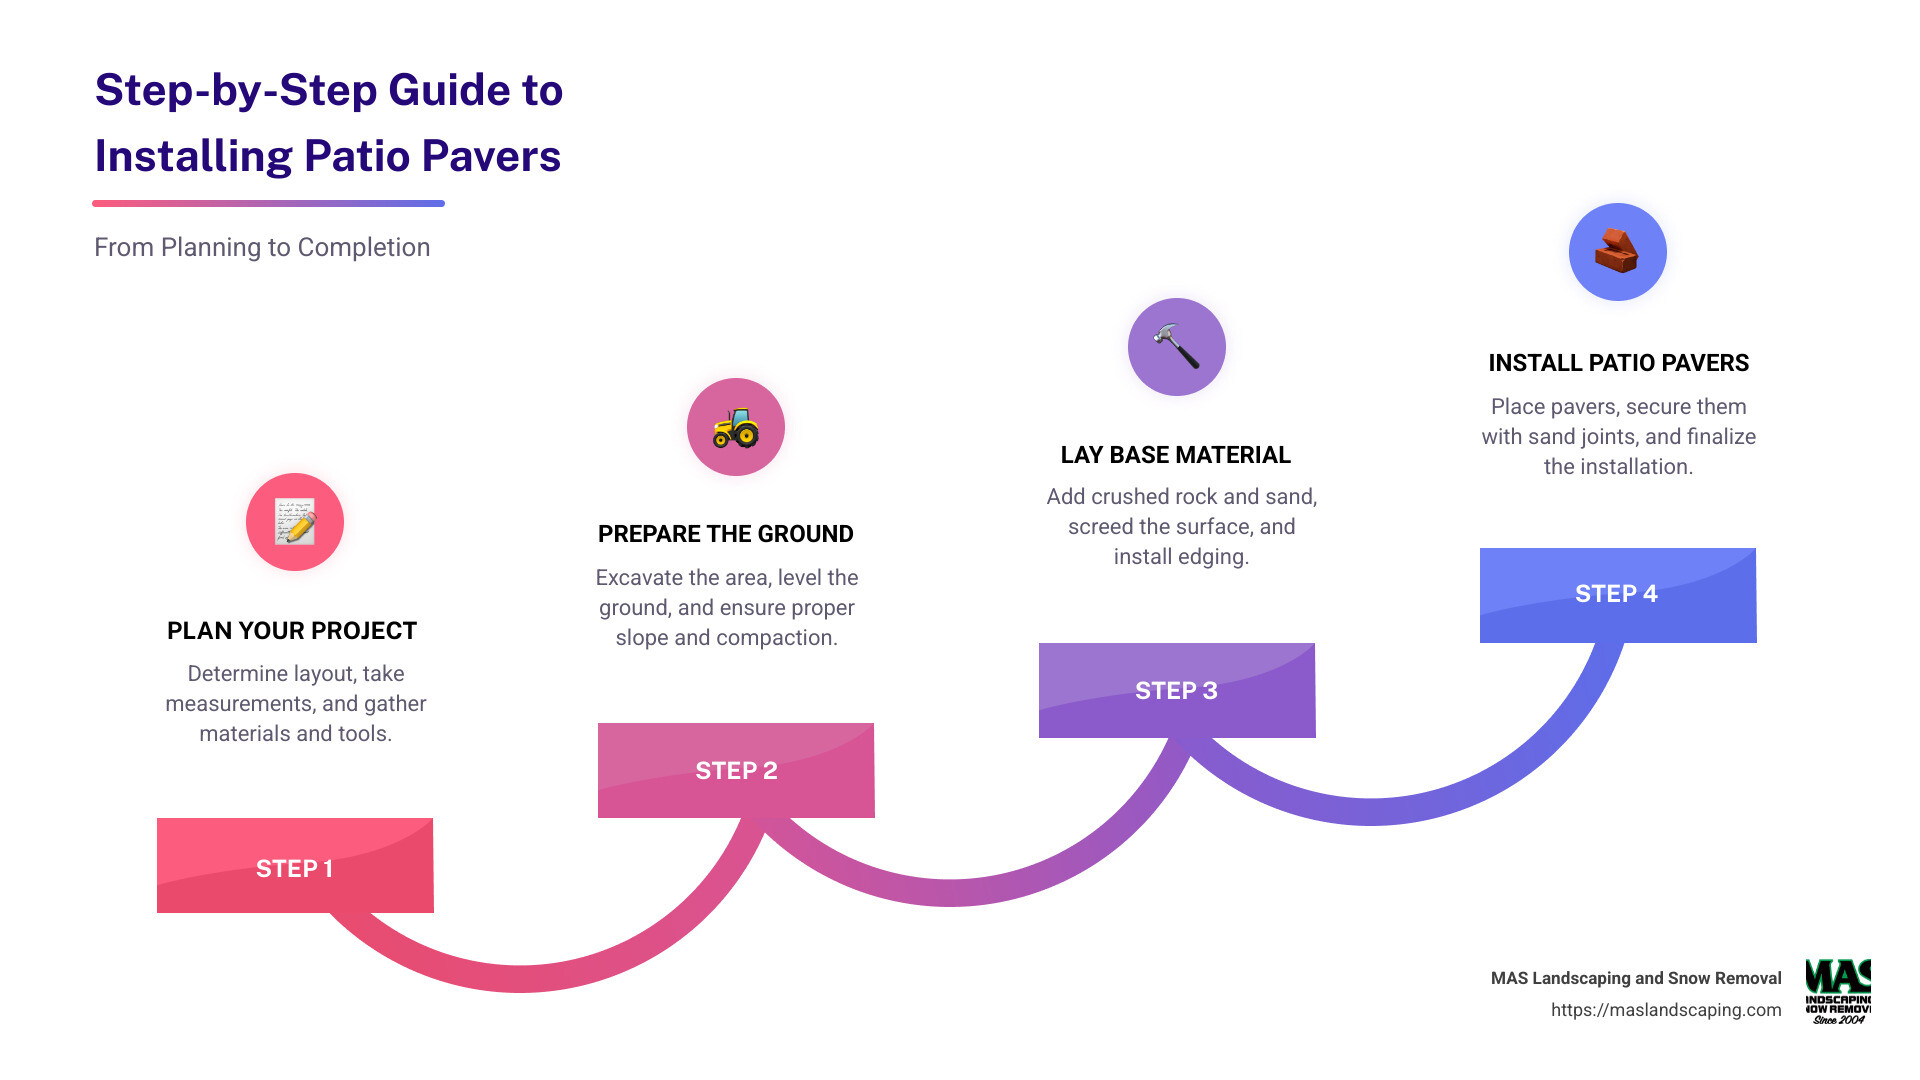
Planning Your Patio Paver Project
Before diving into the installation, planning your patio paver project is crucial. A well-thought-out plan saves you time, money, and potential headaches down the line. Here’s how to get started.
Determining the Area
First, decide where you want your patio. Use a garden hose to outline the shape of the area. This flexible tool helps you visualize the space without committing to a final design.
Next, grab some wood stakes and twine. Drive the stakes into the ground at key points along your outline. Then, string the twine between them. This will give you a clear perimeter to work within.
Finish by using marking paint to define the edges. This ensures you maintain the correct dimensions during excavation.
Calculating Materials Needed
Once your area is marked, it’s time to calculate the materials. Here’s a simple guide:
- Measurements: Measure the length and width of your marked area. Multiply these to find the square footage.
- Pavers: For a snug fit, plan for some extra pavers. A good rule of thumb is to add 10% to your total to account for cuts and breakage.
- Base Material: You’ll need a solid foundation. Calculate the amount of crushed rock or gravel by multiplying the area by the depth you desire, usually about 6 inches.
- Sand: A 1-inch layer of coarse sand helps level the pavers. Use about 1/3 as much sand as gravel, measured in cubic volume.
- Tools: Ensure you have the right tools on hand. A shovel, tape measure, and level are essential. Consider renting a plate compactor for larger projects.
By planning carefully, you set the stage for a smooth installation. This preparation phase ensures that you have everything you need to instal patio pavers effectively and efficiently.
Next, we’ll dig into how to prepare the ground for your patio paver project.
Preparing the Ground
Creating a solid foundation is key to a long-lasting patio. Properly preparing the ground ensures your pavers stay put and look great for years. Here’s how to get started.
Digging Out Turf and Soil
Begin by removing the turf and topsoil from your marked area. This step is crucial for creating a stable base. Use a shovel to dig down to the required depth, typically about 6 to 8 inches, depending on your paver and base material thickness.

Check the Slope: As you dig, ensure the area slopes away from any structures, like your house. A slope of about 1 inch for every 8 feet helps with water drainage. Mark the desired slope with a line level attached to a piece of twine stretched between stakes.
Smoothing and Tamping the Area
Once the turf and soil are out, it’s time to level the area. Use a two-by-four to smooth the soil. Place the board across the area and drag it back and forth to level the surface.
Adjust the Soil: If you find low spots, add soil and re-level. For high spots, remove excess soil. Checking the slope again at this stage ensures proper drainage.
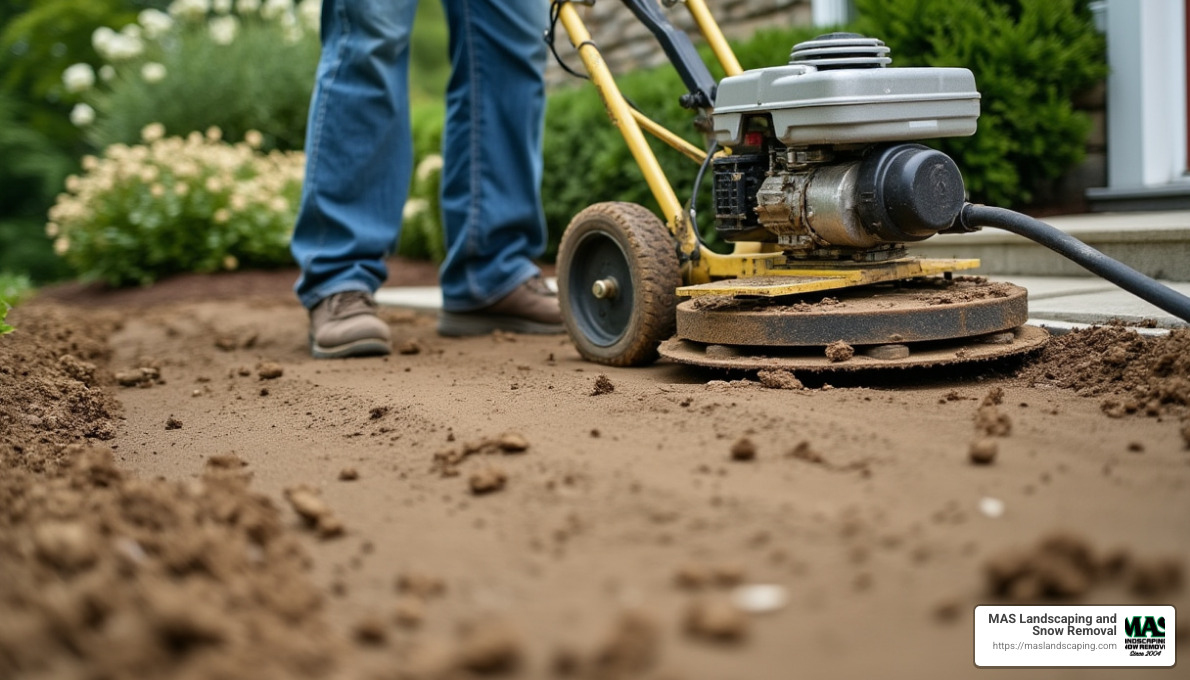
Compaction: After leveling, compact the soil using a tamping tool. This step prevents future settling and shifting. For larger areas, consider renting a plate compactor. A well-compacted base is essential for stability.
With these steps, you’ve created a solid foundation for your patio. Now, you’re ready to move on to laying the base material, which will further support your pavers.
Laying the Base Material
Creating a sturdy base is crucial for a successful patio paver project. The base supports the pavers and helps prevent shifting or sinking over time. Let’s explore the steps for adding the base layer and installing edging.
Adding the Base Layer
- Spread Material: Start by spreading a 4-inch layer of crushed rock or gravel across the entire area. This layer acts as the foundation for your patio and provides excellent drainage.
- Rake and Screed: Use a garden rake to evenly distribute the gravel. Then, place a length of electrical conduit on the gravel to act as a guide. Drag a straight 2×4 board across the conduit to screed the surface, ensuring it’s level.
- Tamp the Base: Once the gravel is spread and leveled, compact it using a plate compactor. This step is crucial to create a firm base that won’t shift. If you don’t have a plate compactor, you can use a hand tamper, but it may take longer.
- Coarse Sand Layer: After compacting the gravel, add a 1-inch layer of coarse sand. Use the same screeding method to ensure the sand is level. Remove the conduit and fill any gaps with more sand, then re-screed those areas.
Installing Edging
- Edge Restraint: To keep your pavers in place, install an edge restraint around the perimeter of your patio. This can be made from plastic, metal, or wood. The edge restraint prevents the pavers from spreading and helps maintain the shape of your patio.
- Staked Edging: Secure the edge restraint with stakes. Drive the stakes into the ground using a rubber mallet, ensuring they are firmly in place. Space the stakes about 12 inches apart for maximum stability.
With the base layer and edging complete, your patio area is now ready for the next step: laying the pavers. This solid foundation will ensure your patio remains stable and beautiful for years to come.
Instal Patio Pavers
With the base layer and edging in place, it’s time to instal patio pavers. This step involves laying down coarse sand, placing the pavers, and adding sand to the joints. Let’s break it down.
Laying Down Coarse Sand
After compacting the gravel base, spread a 1-inch layer of coarse sand over the area. Use the screeding method to ensure the sand is level. Place electrical conduit pipes as guides on the sand. Then, drag a straight 2×4 board across the pipes to screed the surface.
Once the sand is level, carefully remove the conduit pipes. Fill in the gaps left by the pipes with more sand, and smooth these areas with the board. This ensures a consistent height across the entire patio.
Placing the Pavers
Begin at a corner of your patio, placing the pavers one by one. Aim for tight joints to minimize gaps. Use a rubber mallet to gently tap each paver into place, ensuring they sit firmly on the sand.
If a paver doesn’t fit perfectly, adjust its size using a wet/tile saw or a mason chisel. This helps maintain a uniform look and prevents shifting over time. Continue laying the pavers row by row, checking frequently that they remain level.
Adding Sand to Joints
Once all the pavers are in place, it’s time to add sand to the joints. Use fine sand or polymeric sand for this step. Spread the sand evenly over the pavers and sweep it into the joints with a broom.
Polymeric sand is a great choice because it hardens when wet, securing the pavers and preventing weeds from growing between them. After sweeping the sand into the joints, use a plate compactor to tamp the pavers gently. This helps settle the sand and ensures the pavers are firmly set.
By following these steps, you’ll create a beautiful and durable patio that improves your outdoor space. Next, let’s address some frequently asked questions about installing patio pavers.
Frequently Asked Questions about Installing Patio Pavers
What Do You Need to Put Under Patio Pavers?
When installing patio pavers, the layers beneath are crucial for stability and longevity. Here’s what you need:
- Base Material: Start with a stabilizing base of 3/4-inch minus construction gravel or crushed rock. This layer provides a solid foundation and helps with drainage.
- Coarse Sand: On top of the gravel, add a layer of coarse sand. This allows for minor adjustments and helps the pavers settle evenly.
- Fine or Polymeric Sand: After placing the pavers, sweep fine sand or polymeric sand into the joints. Polymeric sand hardens when wet, which helps keep the pavers in place and prevents weed growth.
Some advanced installations might use mortar, bituminous material, or pedestals, but these are typically for specialized or commercial projects.
How Do You Prepare the Ground for Pavers?
Proper ground preparation ensures your patio remains level and stable. Here’s how to do it:
- Clear the Area: Remove any roots, rubble, or debris. The ground should be root-free and rubble-free to prevent future shifting.
- Excavate: Dig out the area to a depth that accommodates your gravel base, sand layer, and pavers. The pavers should slope away from buildings to aid water drainage.
- Level and Compact: Use a tamper or plate compactor to level and compact the soil. A compacted base is essential to prevent settling and shifting over time.
- Add a Sand Sub-Base: Spread a layer of sand over the compacted soil. This acts as a cushion and helps with leveling the pavers.
Can You Lay Pavers Directly on Dirt?
Laying pavers directly on dirt is not recommended. Here’s why:
- Stability Issues: Without a compacted base, pavers can shift, settle unevenly, or even crack over time.
- Drainage Problems: Dirt doesn’t provide adequate drainage, which can lead to water pooling and damage.
- Weed Growth: Directly laying on dirt increases the risk of weeds growing between pavers.
For a durable and long-lasting patio, always prepare a levelled ground with a compacted base of gravel and sand. This ensures stability, proper drainage, and reduces maintenance in the long run.
Conclusion
Installing patio pavers transforms your outdoor space into a functional and beautiful area. It’s a project that involves careful planning, precise execution, and attention to detail. From preparing the ground to laying the base material and placing the pavers, each step ensures the durability and aesthetics of your patio.
At MAS Landscaping and Snow Removal, we understand the intricacies of creating stunning landscapes. Our professional services are designed to cater to the unique needs of clients in and around Saugus, MA. Our team combines local expertise with a commitment to quality, ensuring that your patio not only looks great but also stands the test of time.
We pride ourselves on our personalized service. Every project is custom to reflect your vision while complementing the local environment. Whether it’s choosing the right materials or designing a layout that improves your home’s appeal, we are here to guide you every step of the way.
Choosing MAS Landscaping and Snow Removal means opting for a partner who values professionalism and excellence. We are dedicated to bringing your dream outdoor space to life, ensuring that every detail is handled with care and expertise.
Ready to transform your outdoor area with a stunning patio? Contact us today to explore how we can help you create the perfect landscape for your home. Let’s make your vision a reality together!
