


What is Sod and Why is it the Easiest Choice for a New Lawn?
What Exactly is Sod?
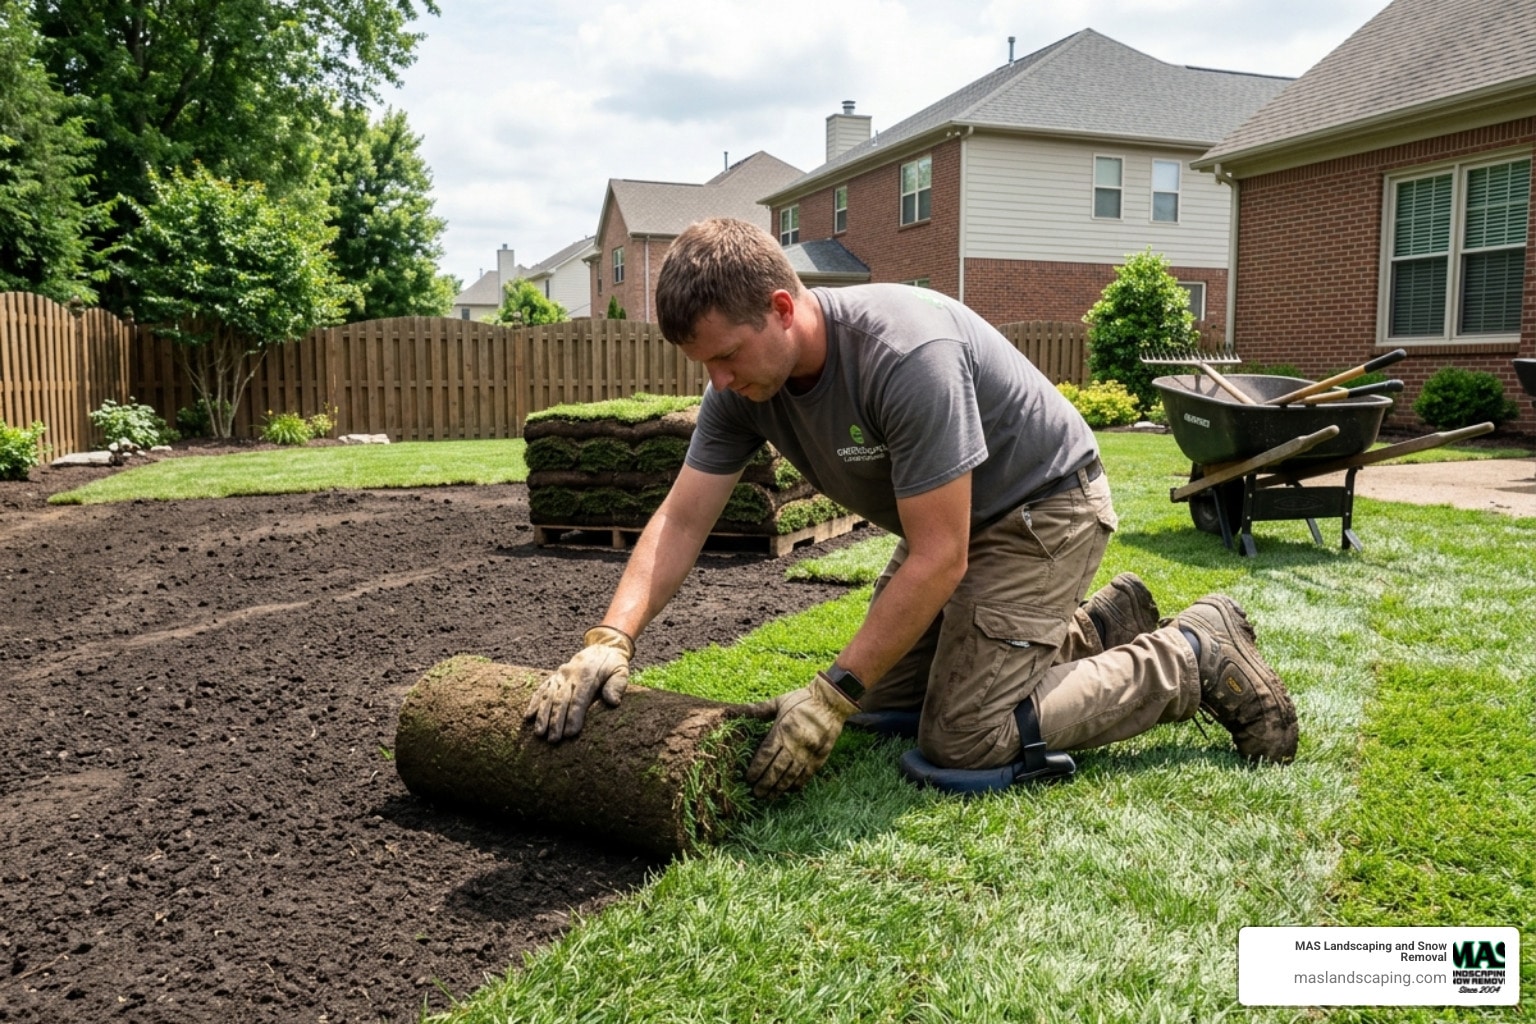
Sod is essentially pre-grown grass, harvested in rolls or squares with a shallow layer of soil and its root system intact. It’s like buying a mature lawn ready to be unrolled. Sod harvested pieces typically include 1/2-to-3/4-inch of soil plus grass roots, removing about two-thirds of the grass’ root system, making immediate watering essential. This ready-to-install turf provides an instant green carpet, transforming your landscape in a single day.
Why Choose Sod Over Seeding?
Sod offers several distinct advantages over traditional seeding, making it the “easiest” choice for many homeowners looking for a quick and reliable lawn solution:
- Instant Results: Unlike seeding, which can take 6 weeks or more to show significant growth and requires delicate care during germination, sod provides an immediate, finished lawn. You get that lush, green look right away.
- Erosion Control: The mature root system in sod helps prevent soil erosion from day one, especially on slopes or newly graded areas. This is a significant benefit, as newly seeded lawns are very vulnerable to washouts.
- Fewer Weeds: A dense sod lawn leaves little room for weeds to germinate and establish, reducing initial weed control efforts. With seeding, you often battle weeds competing with your young grass.
- Durability: Sod is more resilient to foot traffic and environmental stressors much sooner than a newly seeded lawn. While you still need to be careful, a sodded lawn can handle light use much faster.
- Reliability: Sod roots typically take 2 to 6 weeks to establish and bond with the underlying soil after installation, offering a more predictable outcome than seeding. The controlled environment of sod farms ensures a healthy, uniform product.
If you’re looking for an immediate transformation and a more robust start for your lawn, sod is undoubtedly the simpler and faster path to a beautiful yard.
More info about new lawn installation; More info about laying a new turf lawn
How Do You Prepare Your Yard for Optimal Sod Installation?
Proper preparation is the bedrock of a successful sod lawn. Skimping on these steps can lead to a host of problems down the line, from uneven growth to poor rooting. We always emphasize that the effort you put in now will pay dividends in the health and beauty of your lawn for years to come.
Accurate Measurement and Ordering
Before you even think about laying sod, you need to know precisely how much to order. This prevents costly delays or having too much sod go to waste.
- Measure: For rectangular areas, measure the length and width of your space. For irregular shapes, break them down into smaller, measurable sections (e.g., squares, rectangles, triangles) and measure each part.
- Calculate: Multiply the length by the width for each section to get the square footage. Add these together for your total area. Remember to subtract any hardscaped areas like patios, walkways, or garden beds where sod won’t be laid.
- Order Extra: Always order 5-10% more sod than your calculated area. This buffer accounts for trimming, irregular shapes, and any potential waste. It’s far better to have a little extra than to run short and have to wait for another delivery, potentially compromising the freshness of your sod.
Soil Preparation: The Foundation of Success
Proper soil preparation is the most critical step for successful sod establishment. New sod needs a healthy, welcoming environment to root deeply and thrive.
- Remove Existing Vegetation: Completely remove old grass, weeds, and debris. This can be done using a sod cutter (which you can rent), a flat shovel for smaller areas, a rototiller, or by applying a non-selective herbicide. It’s crucial to understand why this step is non-negotiable: never lay sod over existing turf or weeds. That old layer acts like a sponge, holding too much water initially, then drying out into a barrier that prevents new roots from establishing. Weeds will also compete aggressively for water and nutrients, eventually pushing through your new sod. Mechanical removal with a sod cutter is often the fastest and easiest way for larger lawns.
- Soil Testing and Amendments: We highly recommend conducting a soil test (available through your local extension office or with home kits) about a month in advance of your planned installation. This test will determine your soil’s pH and nutrient levels. The ideal pH for most sod varieties is between 6.0 and 7.0. If your pH is too low (acidic), we might recommend adding lime; if it’s too high (alkaline), sulfur can help. Incorporating organic matter like compost is also vital, as it improves soil structure, drainage, and nutrient retention, whether your soil is sandy or clay-heavy. If your soil test indicates a deficiency, apply a starter fertilizer with higher phosphorus at this stage, as phosphorus is key for root development.
- Grading and Leveling: Proper grading is essential to prevent water pooling, which can kill new sod and even cause structural issues for your home. Ensure you create a gentle slope (1-2%, meaning a 1-2 foot drop for every 100 feet) away from your home’s foundation and other structures. The prepared soil surface should also be approximately 1 inch below surrounding paved surfaces like sidewalks and driveways. This allows room for the sod itself, preventing it from creating a trip hazard or impeding drainage. Fill any low spots with quality topsoil to ensure a smooth, even surface.
- Tilling and Loosening: Loosen the top 4-8 inches of soil with a rototiller or spade. This creates a soft, aerated bed that allows new sod roots to penetrate deeply and quickly. If you’re adding new topsoil, ensure you have a layer of at least 4 to 6 inches deep for proper rooting. This depth gives the roots ample space to grow strong and healthy.
- Final Rake and Roll: After tilling and adding amendments, rake the soil smooth, removing any remaining rocks, roots, or large clods (anything larger than 2 inches in diameter). Then, lightly roll the entire area with a lawn roller (often rentable) to create a firm but not compacted surface. The goal is a surface firm enough that you sink no more than 1/2 inch when walking on it. This step helps eliminate any hidden air pockets and provides a uniform bed for the sod.
- Pre-Watering: Just before your sod delivery arrives, lightly water the prepared soil until it is damp but not muddy. This provides initial moisture for the sod and helps it adhere to the underlying soil.
Scientific research on soil preparation for sod; More info about preparing lawn for new sod; More info about how to prepare ground for sod
Essential Tools and Materials
Having the right equipment on hand makes the sod laying process much smoother and more efficient. Before your sod arrives, gather these essentials:
- Measuring tape or wheel
- Sod cutter (often available for rent from local equipment suppliers)
- Rototiller (also typically rentable)
- Steel rake (a sturdy bow rake works best)
- Wheelbarrow (for moving soil or sod pieces)
- Utility knife or sharp spade (for cutting sod)
- Lawn roller (rentable, can be filled with water or sand)
- Garden hose with a sprinkler attachment
- Work gloves and sturdy footwear
- Plywood boards (to walk on newly laid sod without disturbing it)
- Sod staples or landscape pins (especially for slopes)
- Starter fertilizer (if not applied during soil preparation)
- Topsoil and soil amendments (as needed, based on soil test results)
- Fresh sod (delivered the day you plan to install)
What are the Essential Steps for Laying Sod Correctly?
Once your soil is perfectly prepared and your tools are ready, it’s time for the main event: laying the sod. This is where your instant lawn truly comes to life!
Timing Your Sod Installation
Timing is crucial when it comes to sod. Because it’s a living product, it’s quite sensitive to environmental conditions and needs to be installed quickly.
- Best Seasons: For our region in Massachusetts, the best time to lay sod (which typically consists of cool-season grasses) is generally in early fall (late August through October) or early spring (April through May). These periods offer cooler temperatures and often more rainfall, which are ideal for root establishment without the intense heat stress of summer or the risk of freezing before rooting in late fall.
- Avoid Summer Heat: While sod can be laid almost anytime the ground isn’t frozen, we strongly advise against laying sod during extreme summer heat. High temperatures can cause the sod to go dormant and struggle to root, increasing the risk of failure despite diligent watering.
- Delivery and Installation: Sod is a living product and begins to deteriorate once harvested. It must be installed the same day it is harvested and delivered. Sod laid more than 24 hours after harvesting may not survive. Therefore, schedule your delivery for the exact day you plan to install it. Plan to start early in the morning to beat the heat and give yourself ample time.
- Temporary Storage: If, for unforeseen reasons, there’s a slight delay between delivery and installation, store sod rolls in a cool, shaded area. Mist them lightly to prevent drying out, but do not soak them, as this can lead to disease. Unroll a few pieces if they’re sitting for more than a few hours to allow air circulation.
The Laying Process: Step-by-Step
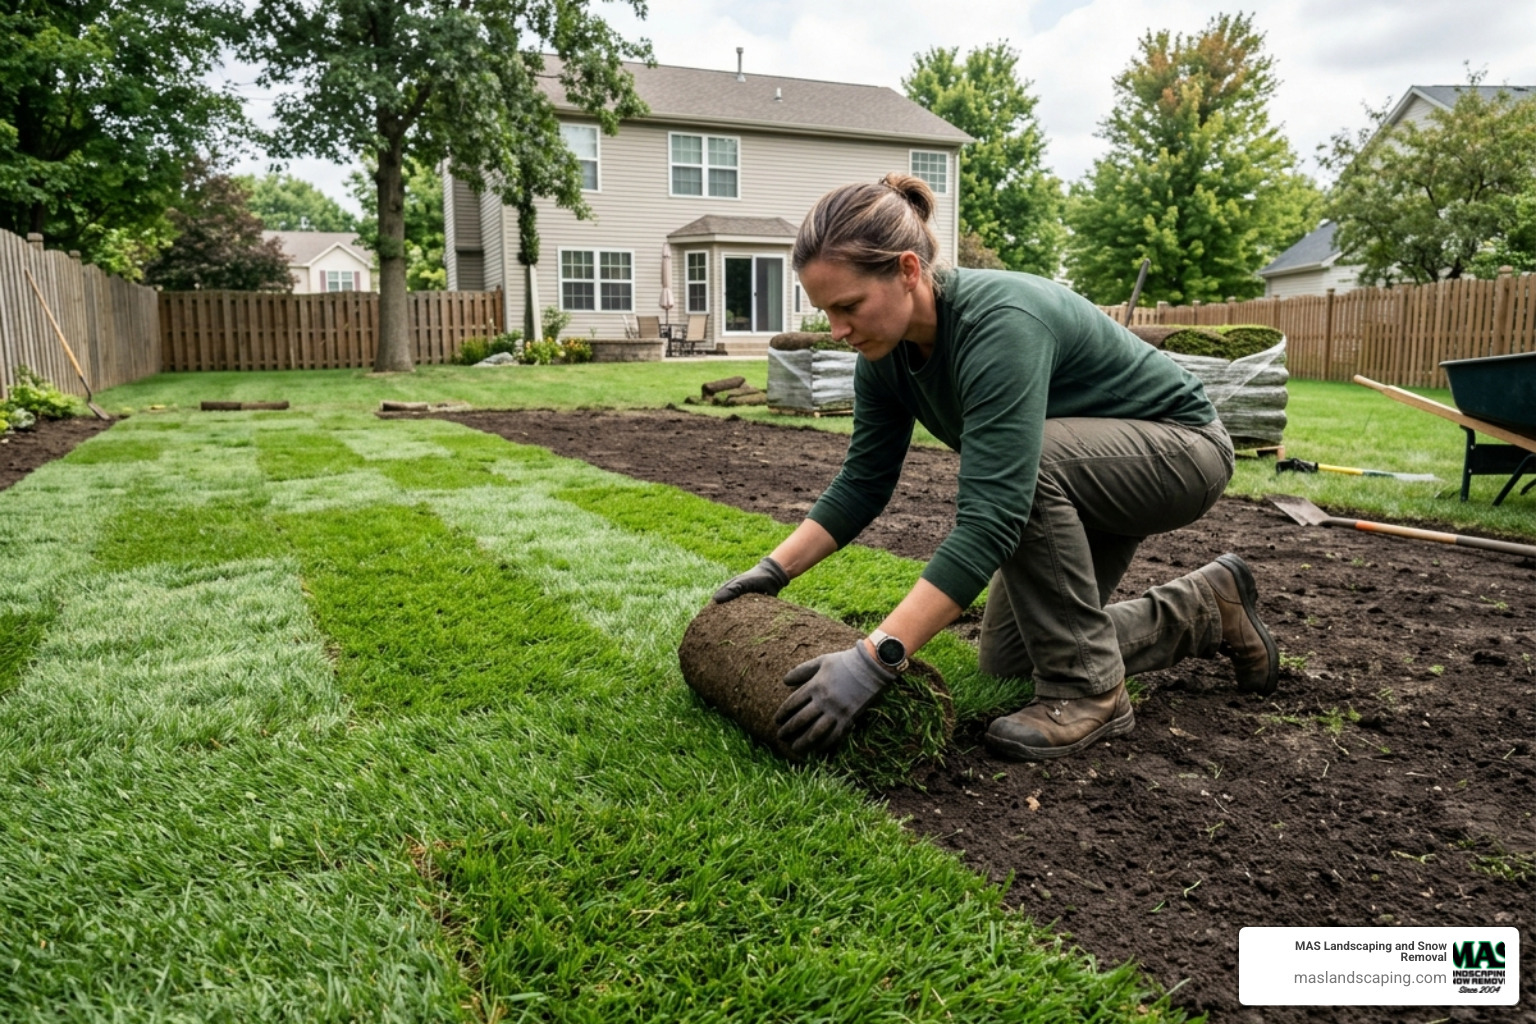
This is where your vision of a lush lawn truly begins to take shape. Work efficiently and methodically, remembering that the sod needs to be laid and watered as quickly as possible.
- Start Straight: Begin laying sod along the longest straight edge of your lawn, such as a driveway, patio, or a fence line. This provides a good reference point and helps ensure your rows are straight and true across the entire area.
- Brick Pattern: Lay sod strips in a staggered, brick-like pattern. This means that the end seams of adjacent rows should not line up. This technique prevents continuous seams, which can dry out more easily and create weak spots in your new lawn. It also gives a more natural, uniform appearance.
- Butt Edges Tightly: Ensure each piece of sod is butted tightly against the next, both end-to-end and side-to-side. You want a snug fit without any gaps that could dry out or allow weeds to grow. Conversely, avoid overlapping, as this creates air pockets underneath that prevent proper root contact.
- Avoid Stretching: Do not stretch the sod as you lay it. Sod is somewhat elastic, but stretching it can cause it to shrink back later, creating unsightly gaps between pieces.
- Trim as Needed: Use a sharp utility knife or spade to cut sod around obstacles, curves, and edges. For curves, it’s often more effective to lay the sod over the curved area and then cut through both the top piece and the one beneath it. This ensures a clean, precise edge that follows the contour perfectly. For small, intricate cuts, you might find it easier to cut from the soil side of the sod.
- Good Soil Contact: Immediately after laying a section of sod, gently press it down with your hands or feet to ensure complete contact with the prepared soil beneath. This is critical for the roots to establish quickly. Once you’ve laid a larger section, use a lawn roller (filled with water or sand) to roll the entire area in two perpendicular directions (e.g., roll north-south, then east-west). This step helps eliminate any remaining air pockets and further promotes root-to-soil bonding.
- Handling Slopes: When laying sod on slopes, it’s important to lay the strips perpendicular to the slope (across it, rather than up and down). This helps to slow water runoff and prevent the sod from shifting or sliding downhill. For steeper inclines, use sod staples or landscape pins to secure the sod firmly in place until the roots can take hold.
- Irregular Shapes and Obstacles: For areas around sprinkler heads, cut a small ‘X’ in the center of the sod piece and carefully slide it over the sprinkler head. For small gaps or awkward spaces, it’s generally better to fill them with quality topsoil rather than trying to fit tiny sod scraps, which tend to dry out quickly and struggle to root.
Scientific research on sod laying techniques; More info about how to lay sod; More info about how to plant sod
How Do You Care for New Sod to Ensure Long-Term Success?
Laying the sod is a significant achievement, but the work isn’t over. The initial aftercare, particularly watering, is paramount to ensuring your new lawn establishes successfully and thrives for years to come. This phase is about nurturing those delicate new roots.
Immediate and Consistent Watering
Insufficient water is the leading cause of new sod failure. The sod pieces, having had two-thirds of their root system removed during harvesting, are highly vulnerable to drying out. Consistent moisture is non-negotiable.
- Immediate Watering: Begin watering thoroughly within 20 minutes of laying the first section of sod. Don’t wait until all the sod is down, especially on a warm day. This initial watering is critical to rehydrating the turf and initiating the rooting process.
- First 2-6 Weeks: New sod needs to be watered frequently until it takes root, which typically occurs within 2 to 6 weeks. During the first two weeks, we recommend watering at least once per day, and often twice a day, especially during warmer weather. The goal is to keep the sod and the soil beneath consistently moist, but never muddy or waterlogged. The top 4-6 inches of soil should remain damp. Lift a corner of the sod occasionally to check that the soil beneath is moist to this depth.
- Checking Moisture: A simple way to check if you’re watering enough is to gently lift a corner of a sod piece. The soil underneath should feel moist, not just damp on the surface. If it’s dry, increase your watering duration.
- Transitioning Watering: After the initial establishment period (typically 2-3 weeks, or when the sod resists a gentle tug), you can gradually reduce the watering frequency but increase the duration. This encourages the roots to grow deeper into the soil in search of moisture, making the lawn more drought-tolerant. Eventually, you’ll transition to deep, infrequent watering (aiming for 1 to 1.5 inches of water per week) once the sod is fully established.
Mowing, Fertilizing, and Usage

Patience is key in these early weeks. Resist the urge to treat your new sod like an established lawn immediately.
- Mowing: Wait until the sod has firmly rooted and the grass blades are at least 3 inches tall (this usually takes 2-3 weeks, depending on growth conditions). When you do mow, ensure your mower blade is sharp to prevent tearing the grass. Set your mower to its highest setting (typically 3-4 inches). Only remove no more than one-third of the grass blade height at a time. Avoid mowing when the sod is wet, as this can lead to clumping and disease.
- Fertilizing: If you applied a starter fertilizer during the soil preparation phase, wait 4-6 weeks after installation before applying a general lawn fertilizer. If you didn’t use a starter fertilizer during prep, you can apply one with higher phosphorus 2-3 weeks after installation to further promote root growth. Always follow the product instructions carefully, as over-fertilizing new sod can “burn” the delicate roots.
- Foot Traffic: Minimize foot traffic on your new sod for the first 2-3 weeks. This allows the roots to establish without disturbance or compaction. If you must walk across it, place plywood boards down to distribute your weight evenly. Keep pets off the new lawn during this critical period.
- Long-Term Care: Once your sod is fully established, continue with a regular lawn care program tailored to your grass type and our local Massachusetts climate. This includes proper watering, seasonal fertilization, and vigilance for pests and diseases.
More info about how to maintain a new lawn after installation; More info about best fertilizer for new sod
What Common Mistakes Should You Avoid When Laying Sod?
Even with the best intentions, it’s easy to make mistakes when laying sod. Being aware of these common pitfalls can save you a lot of frustration, time, and money. We’ve seen these issues arise, and we want to help you avoid them.
Overlooking Soil Preparation
This is, without a doubt, the most frequent and most damaging mistake we encounter.
- Laying Over Old Grass/Weeds: As we mentioned, this is one of the biggest “overlooked killers” of new sod. Homeowners sometimes think they can just put new sod on top of existing turf. However, that old grass acts like a sponge, holding too much water initially, then drying into a barrier that prevents new roots from establishing. Weeds will also compete aggressively for resources and eventually push through, ruining the appearance and health of your new lawn.
- Skipping Soil Testing: Without knowing your soil’s pH and nutrient levels, you’re essentially guessing what your new sod needs. This can lead to poor nutrient uptake, slow rooting, and an unhealthy lawn that struggles to thrive. A soil test provides the roadmap for proper amendments.
- Poor Grading: Incorrect grading can lead to serious drainage issues. If your yard isn’t properly sloped away from your home (1-2%), water can pool against your foundation, causing structural damage. Standing water will also suffocate new sod roots, killing it faster than any weed.
Installation and Timing Errors
These mistakes often stem from underestimating the time-sensitive nature of sod.
- Delayed Installation: Sod is a living, perishable product. Once harvested, it starts to deteriorate. Leaving it rolled up for more than 24 hours (or even less in hot weather) can compromise its roots, cause it to heat up, and lead to significant failure. Always schedule your delivery for the day you plan to install and start work immediately.
- Gaps or Overlaps: When laying sod, precision matters. Gaps between pieces allow the edges to dry out quickly, leading to brown strips. Overlaps, on the other hand, create air pockets underneath, preventing proper root contact with the soil. Both scenarios hinder successful establishment.
- Not Rolling: Skipping the crucial step of rolling the sod after installation leaves air pockets between the sod and the prepared soil. These air pockets prevent the roots from making firm contact with the soil, leading to dry spots, uneven growth, and overall poor rooting.
Post-Installation Missteps
The care you provide immediately after installation is just as important as the preparation.
- Improper Watering: This is the most common cause of new sod failure.
- Underwatering: The sod dries out, the roots die, and the grass turns brown.
- Overwatering: While less common, continuous saturation can lead to fungal diseases and root rot, especially in poorly drained soil. Consistent, appropriate moisture – damp but not soggy – is the delicate balance you need to maintain.
- Walking on New Sod Too Soon: This compacts the newly loosened soil and can dislodge the delicate new roots trying to establish themselves. This delays the rooting process and can create uneven patches.
- Fertilizing Immediately: Applying a general fertilizer too soon, especially one high in nitrogen, can “burn” the new sod. The delicate roots are not yet ready to handle a strong nutrient boost and can be damaged. Always wait until the sod has begun to root, or use a specific starter fertilizer as recommended by your soil test.
- Mowing Too Early or Too Short: Mowing before the roots are established (typically 2-3 weeks) or cutting the grass too short stresses the new sod. This diverts energy from root growth to leaf repair, hindering establishment and making the lawn more vulnerable to disease and drought.
By being mindful of these common mistakes, you significantly increase your chances of achieving a beautiful, healthy, and long-lasting lawn.
More info about the green carpet treatment a complete guide to installing fresh sod
Frequently Asked Questions about Laying Sod
We often hear similar questions from homeowners considering or undertaking a sod project. Here are some of the most common ones we address:
How long does it take for sod to root?
Sod roots typically take 2 to 6 weeks to establish and bond with the underlying soil after installation. The exact time can vary depending on the grass type, time of year, soil conditions, and how diligently you follow the watering schedule. You can perform a quick “tug test” by gently lifting a corner of the sod; if it resists and feels anchored, it’s rooting well.
When can I mow my new sod for the first time?
You should wait until the grass blades are at least 3 inches tall and the sod has firmly rooted. This usually takes about 2-3 weeks. Before mowing, ensure the sod doesn’t lift when you gently tug on it. When you do mow, use a sharp mower blade and set it to its highest setting (3-4 inches). Only remove no more than one-third of the grass blade height at a time to avoid stressing the new lawn.
Should I fertilize new sod immediately after laying it?
No, it’s generally not recommended to fertilize new sod immediately after laying. If you incorporated a starter fertilizer (high in phosphorus) into the soil during your preparation phase, you should wait 4-6 weeks after installation before applying a general lawn fertilizer. If no starter fertilizer was used during prep, you can apply one (again, high in phosphorus) 2-3 weeks after laying the sod to encourage root growth. Applying a strong fertilizer too soon can “burn” the delicate new roots, causing more harm than good.
Conclusion
Laying sod is an investment that can quickly transform your yard into a lush, inviting landscape. By following these best sod laying tips—from meticulous soil preparation and careful installation to diligent aftercare—you’ll set your new lawn up for long-term success. It’s a project that requires effort and attention to detail, but the reward of an instant, vibrant green lawn is truly satisfying.
While it’s a rewarding DIY project, we understand that it’s also a significant undertaking. If you’re in the Saugus, Everett, Lynnfield, Malden, or other surrounding areas of Massachusetts and prefer professional expertise for your new lawn installation, grading, or ongoing landscape maintenance, MAS Landscaping and Snow Removal is here to help. Our team is committed to providing personalized service and local expertise to create the beautiful outdoor space you envision, ensuring your new sod thrives.
Contact MAS Landscaping for professional sod installation and landscaping services